December 28, 2011

"Watch Me Grow" Boards

I've always loved the idea of tracking my children's heights through the years on the door jams to their rooms.  One tinesy winesy problem.  We move... A Lot.  Perks of a military life right?  Anyway I didn't want to miss out on the opportunity so I decided to make some charts I could take with me from house to house.


Their names are printed in vinyl at the bottom foot of the board.  Each board is 6' tall, 6" wide, and 1" thick.
My girls got to pick their paint colors (with supervision) and my husband helped me paint them last week.
Next day I cut my vinyl using my Silhouette and (the most tedious part was:) put each little line on one by one. (I suppose I could have spaced it out on the computer but I didn't want to waste four feet of vinyl for tiny little lines when I only needed about 9" total.)  Then I cut some decorations from colored vinyl and randomly laid them on.


Lastly, I pulled out their baby books tonight and marked their heights according to my records.  Starting at 6 months, about the time they "make the chart," and then each year after.  I plan on measuring them randomly throughout the year and for sure each birthday.

It was a fun and relatively easy project. My husband even suggested using a router to make the inch marks and then painting them black, (might do that with number 3, but I'm not starting over now!) so I suppose if you don't have a vinyl cutter that is an option, or use paint, or a wood burner, whatever works.  It's the memories that are important, right?

Photobucket

December 25, 2011

phew.....

This is how I currently feel. I have lots of projects to load onto the blog, but they are going to have to wait. In the meantime, enjoy this picture.
I found this little guy like this the other day and had to laugh because I don't think I know anyone that can play with my extremely energetic 2 year old and not feel like this when their done. ")

December 21, 2011

Flower Garden Quilt- Finished!

Some of you might remember this quilt, I started it... oh...about 1 1/2 years ago!  It took me forever to piece it and then I shipped it off to Utah for quilting.  My Mother-in-Law had a busy year and wasn't able to get to it until recently.  She even put the binding on for me, how sweet! (Thanks Laura!)  Anyway, it arrived in the mail today and I just can't wait to show it off!   Ready?


Isn't it just beautiful?  I am super thrilled with the end result.  Because of the green color on the back, in the right light, the white on the front has a slight green tint to it, which just adds to it I think.
It is the most perfect quilt I've ever made, it has very few flaws, and none that are noticeable to the untrained eye.  
It's all ready to go for my littlest girls' SECOND (gal I feel old right now!) birthday in just a few weeks.

Photobucket

December 19, 2011

Frilly Apron

I FINALLY finished the frilly apron project I've been trying to get to for months now.
and the best part is: I Remembered To Take Pictures!
(so proud right now!)
I love the way it turned out, it's very cutesy (and is by FAR the frilliest thing I own.)
If you'd like to make a frilly apron, or a not frilly apron, the tutorial is below.


How To:

First Cut your basic apron shape.
For a half apron cut straight across at the corners.
 Next Cut 3" strips for your ruffles.
I used a fat quarter and it required 4 strips, sewn together.
Serge along one long end of the strips.
Next baste along the opposite long end of the fabric strip and push the fabric together to make ruffles.
Pin the ruffles along the rounded edge of your apron, right sides together.  Stitch down.

 Next make your neck strap by taking two 1 1/2 inch strips (wrong sides together) and placing an interfacing between them, serge edges.
I didn't have an interfacing, but wanted it to be stiff, so I used dryer sheets instead, it gave it the perfect stiffness and it's safe for the wash!
Measure as long as you want it, whatever is comfortable for you, and stitch it down.
Next make your ties, using 3/4" strips, the same way you made the neck strap.

Unpick just a small section of ruffle where you want your ties to sit and stitch back into place.

 Cut out two pockets, whatever shape you want.  Serge or hem along edges.
 Make a ruffle of 1" fabric the same way you did the ruffles earlier.  Stitch it down to the right side of the pocket.  I surged along the edges, just because I felt like it.
Pin them to your apron.  I just set my hand on the apron where it felt natural to have a pocket and marked it with pencil.
Stitch down, remember not to sew the top of the pocket!
Trim all the little threads and Enjoy.


Photobucket

December 17, 2011

How to Make a Radiator Cover for a Diesel Truck Part 1

You might wonder why on Earth I am posting a tutorial on how to make a radiator cover for a diesel truck on our cutesy girly craft blog.  The main reason is because when my husband asked me to make one for his truck I couldn't find a single "how-to" anywhere online!  So for all the guys (or guys' wives) out there looking for a "how to" on this subject, here you go!

This particular cover is made to fit a 1996 Ford F-250, however, it would not be hard to make adjustments to fit your own truck.  On average these covers cost about $60, so far in this project I have spent $5 and plan on maybe spending another $15 for the snaps.

**The fabric I used is called Pro-Tuff Outdoor and it's sold at Wal-mart for about $5 a yard.
It's canvas on one side and I'm going to say Vinyl on the other side, I'm not 100% sure what material it is, but it's sturdy and a great quality for the price.  I tried taking a pic, you can sort of see the difference in texture between the front and back in the picture.


First use a large piece of paper or poster board to trace and cut out a template of half your trucks grill
(I made my husband do this part, a screw up in size was not going to be my fault!)


Next fold your fabric so it has 2 layers and line up the top of your template with the fold (you will not cut the top), trace your template onto the fabric, add an additional inch on each of the two sides and the bottom for seam allowances.  Reverse the template and trace a second pattern for the other half of your grill.
(Once it is sewn, as pic below, it will be just a little larger than it needs to be, better safe than sorry right?)


Fold in the two sides and bottom about 1/4 inch and pin.  Sew using a triple straight stitch around the edges to create a nice and sturdy seam.


Repeat with the other side.

Throughout this process (after cutting and after stitching the first) I made sure that they were still a good fit on the grill so I didn't have to fix more than necessary.

For the moment they should look like this:
The centers will overlap by about 1 to 2 inches and will be secured together with either velcro or snaps.
That's as far as we got tonight;
My husband is going to use some snap screws to attach it, once they arrive.  
We had to order those from Cabela's, it seems they are the only place that sells them!
Once they arrive I'll post the other half of this tutorial and add a link to the bottom of this post.

*Edited*
To access the second part of this post click Here!

Photobucket

Homemade Laundry Detergent

I recently learned how to make my own Laundry Detergent, it might seem strange, that's what I thought at first, but it has it's appeal:
1. There are only 3 ingredients (4 if you want it scented)
2. The ingredients cost about $9 total, that's $9 for a bucket of laundry detergent
3. It makes a 5 gallon bucket of detergent, that's 320 loads for a front loader or 160 loads for a top loader. (320 loads will last my family 4-6 months!)
4. Two of the ingredients have enough to make several buckets before I have to buy more.  So in the end the cost of the detergent is less than $9.
5. It's so Easy to Make!  and a little bit fun too!
The initial purchase will cost just a little bit, because you will need a 5 gallon bucket with a lid ( I used a screw on lid, a little more expensive, but convenient.) And the scent, if you want it, can cost $4-9 but it lasts a long time.

Even with the extra cost at the beginning, when was the last time you bought laundry detergent for less than $6 that lasted your family 4-6 months?  I rest my case.

If you want to give it a try you'll need:

1 bar Fels-Naptha Soap
1 C. Arm & Hammer Washing Soda (not baking soda!)
1 C. 20 Mule Team Borax


(All the ingredients can be purchased at your local grocery or general store in the laundry aisle, you'll have to look for them.)

 You'll also need a 5 Gallon bucket with a lid (especially if you have children, get a lid with a good tight fit)
 Bring 16 cups of water to a simmer in a large pot.
Shred the bar of Fels-Naptha Soap using a cheese grater.

Add the soap to the simmering water and simmer for roughly 30 minutes until all the soap is dissolved.

In the meantime fill your bucket 1/2 full with hot tap water and add your cup of washing soda and borax.  Stir until completely dissolved.
 Once the soap is melted, add it to the bucket and let sit overnight.
In the morning it will be a thick goo.  Top off your bucket with hot tap water and add your fragrance (if you want to.)

This is the fun part: Using bare hands, or gloves if you wish, and mix the detergent well.  You'll have to smush the goo as smooth as you can get it, (you know you always wanted to play with goo!)
It should look like the picture here when you're done.

 My husband had a different idea how to mix it, once I had broken up most of the goo, he got his drill out and attached a wooden spoon to the end.
Need I say more?
It actually worked surprisingly well.
I guess playing with goo is fun for me and using his tools is fun for him!
Mark your bucket and seal it.

If you have a front loader you need 1/4 C per load
If you have a top loader you need 1/2 C per load


**To scent your detergent you need to use pure essential oil, add 10-15 drops of oil per 2 gallons of detergent.  I used Orange, but you could use just about any scent you like.**


Total, between the two days, this takes about an hour to make and it will save you a lot of money!

And just think, you'll be self sufficient, doesn't that just make you feel good?


Photobucket

December 14, 2011

That's What Christmas Is All About Charlie Brown

So I've been having a hard time with Christmas this year. I just can't get in the mood. No matter how many Christmas carols I listen to, or how many Christmas movies I watch. I just don't feel it.  And then to top it off Christmas is on a Sunday this year and our church starts at 9 am!  Which means we will either have to celebrate early, wake up early, or skip church.  On top of everything it just seemed like too much.  But tonight as I was making yet another attempt to get into the Christmas spirit I heard the song "Mary did you know?" and it made me cry. (well okay that's not fair about anything makes me cry anymore.) Then I started thinking about the true meaning of Christmas and I was reminded of Charlie Brown asking if "ANYONE" knows what Christmas is all about....


So my goal for the next week and a half is to try a little harder to remember what Christmas is all about and not to get caught up in the hussle and bussle of this time of year.  It's not about the presents, it's not about the tree, it's not about the parties and the traditions and the crazy hours of shopping and traffic.  It's about our Savior, Jesus Christ, and all he did for us.  So in this light, I have decided that even though Church is at 9 am and I really really want to sleep in, and although Santa will have to come early, of all the places to be on Christmas Day, it seems like church is the place to be.
I hope you all have a very Merry Christmas, and don't forget what it's all about!

December 13, 2011

Honey Orange Teriyaki Chicken


We love the Mr. Yoshida's marinade. It makes a great grilled chicken/turkey marinade, wonderfully delicious stir-fry...yes. We like it. I have usually purchased it from Costco, so I'm not sure where else carries it for sure...but this is a very simple and easy dinner. My boys had seconds and thirds. A two-year old having thirds is definitely considered success at our house! I served with plain rice, and some steamed veggies. Enjoy!

Honey Orange Teriyaki Chicken

Ingredients:
1 Cup Mr. Yoshida's Original Gourmet Sauce
1 Cup Orange Juice-premium, Not from concentrate (or juice from about 3 oranges)
3 tbs orange zest (optional....but do add it!)
6 Tbs. Honey
1 1/2 lbs chicken-breast, sliced or chicken tenders
1 tbs olive oil
Optional: 1/4 cup slivered or sliced almonds, toasted

Directions:
1. In bowl, mix orange jujice, Yoshida sauce, honey, and 3 tbs zest (optional). Reserve 1 cup.
2. Marinate chicken for 10 minutes. Drain chicken; discard marinade.
3. Lightly brush grill pan with olive oil. Heat to medium.
4. Cook chicken, turning once halfway through cooking time (4-6 minutes) and bursh with 1 cup reserved sauce. Cook for 4-6, until thoroughly cooked. Use remaining sauce at table as a dipping sauce or salad dressing.
5. Optional: top with toasted almonds.


Yum. Seriously. You have to make this. :)

December 11, 2011

Poppyseed Chicken

When I first got married, my in-laws told me about about this Poppyseed chicken that they all loved. I thought it sounded nasty....I mean crushed ritz crackers on top....bleck! Anyways I decided to give it a try and turns out I love it! So for all of you out there who are thinking the same thing as I did, give it a try....you may like it too! :)

Poppyseed Chicken (Great freezer meal too!)

You will need:
2 chicken breast (cut into cubes)
Seasonings (I like Mrs. Dash- chicken)
2 Cups Cooked Rice
1/2 tub of sour cream (about a cup)
1 can cream of chicken soup
2 Tablespoons butter or marg. (melted)
1 sleeve of Ritz crackers (if you use the off brand, it tastes funny, so be sure to use Ritz brand)
Poppyseeds (prob. between 1 and 2 Tablespoons)

First cut up your chicken into cubes and cook it in a pan.
Season the chicken as you wish. I prefer Mrs. Dash's chicken seasoning.
Cook your rice, either on the stove or in a rice cooker. I prefer regular rice compared to the instant stuff, I think it tastes better.
Prepare your containers. I usually make smaller pans, so I can freeze a bunch. I buy these containers from the dollar store.
I am making a huge batch, thus the 3 cans and tubs (if your following what I listed above you will only need 1 of each)
Mix together the sour cream and soup.
Add the cooked rice and the cooked chicken and mix together. Then scoop into your pan or pans.
Then take your crackers, butter and poppyseeds....
Crush the entire sleeve of crackers until fine crumbs, then pour in the melted butter and sprinkle in the poppyseeds. Mix well. I like to mix mine in a gallon sized bag, but a bowl would work too.
Then sprinkle a layer of the cracker mixture on top of your rice mixture. (this picture shows that I did a thin layer of crackers....I usually have more)
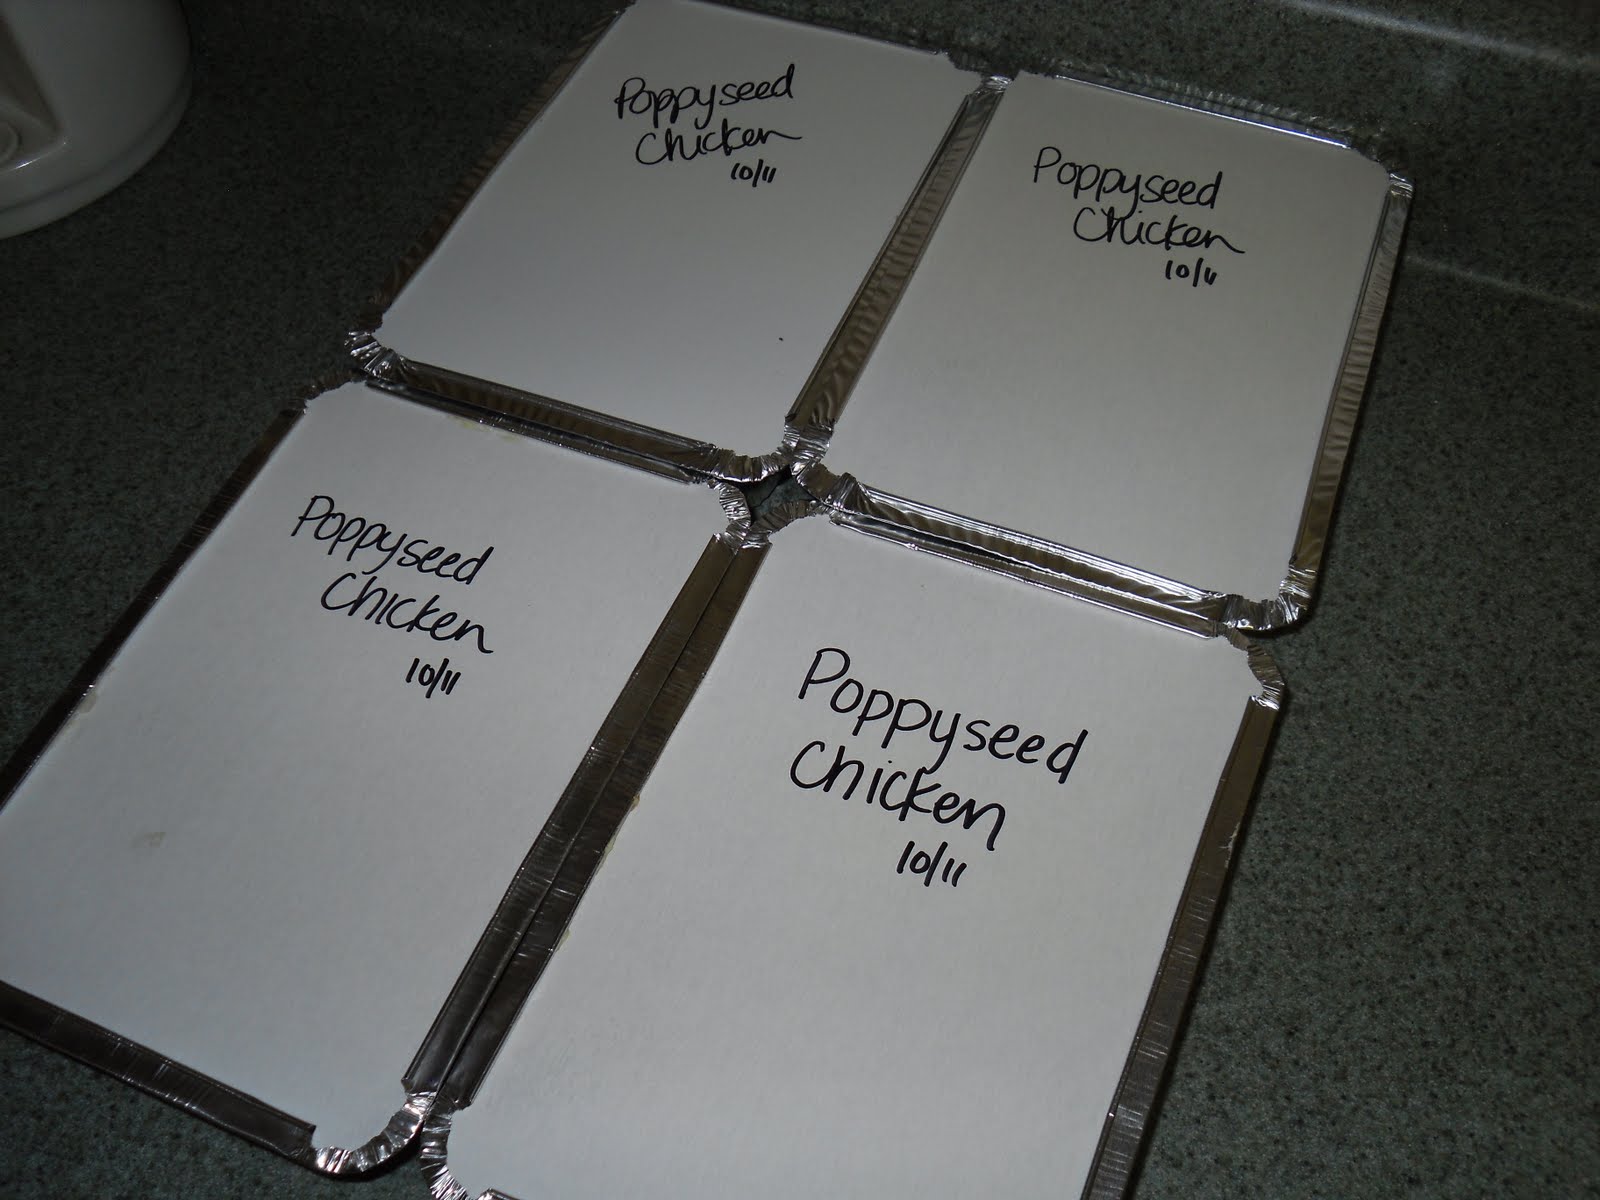
Then bake at 350 degrees for 30 minutes or until hot. If your making this for freezer meals, then label your containers and put in the freezer!
Enjoy!

Finally a Post From Kristie and Flashback to Halloween :)

Well to start off, sorry I haven't posted anying for a very long time. My family recieved some news during the last couple months that turned our lifes completely upside down. We found out my mom has cancer. The Dr.'s first told us it was pre-stage 1 and that all would be well. Then after her 1st surgery, we were told that it was stage 4 and uncurable, but treatable. The timeline also shrunk from 8 months - 10 years down to 6 months - 3 years. It has been a hard trial to deal with, but I think things are finally soaking in and I feel like I am able to continue on with some things now. All the thoughts and prayers that have been sent and are continuing to be sent are much appreciated. We are all very grateful for all the love and support we have recieved.

(WARNING: THIS POST CONTAINS FLASHBACK TO HALLOWEEN :)

I looked back over that last couple months and realized I never posted pictures of my sweet little lady's halloween costume. She was Minnie Mouse and between my mother in law and I we made her whole costume.

We found the pink t-shirt on clearance for $1.97 at Children's Place, I bought the black long sleeved shirt and black tights at Walmart, she already had the pink croc's, and we made everything else. We used a poodle skirt pattern for the polka dot skirt and my mother in law free handed the bloomers (so cute!) She also made the white collar to go on top the shirts. Then I made the all the bows, buttons and ears.
I think it turned out pretty cute! She loved being Minnie and had a great time trick or treating!

December 10, 2011

Our New Author

We'd like to take a quick minute to introduce our readers to our new author, 
Mindy.

Kristie and I have known Mindy since high school, and if memory serves we were all on the year book staff together 9 years ago... (Wow! Ladies are we REALLY that old?!?)  
Mindy loves to craft and we are happy to welcome her aboard.  I think we're all excited to see what she's got up her sleeves.
~~~~~~~~~~~
On another note, those of you who are wondering if we're ever going to finish the redesign on our blog pages, I promise we'll get with it soon.  Personally, I'm trying to figure out what happened to the year.  The last thing I remember was my daughters birthday in May!
Here's hoping for a slightly calmer new year!  Yes?  Maybe?  Please?

December 9, 2011

The. Best. Lemon. Meringue. Pie. Ever.


This recipe is seriously DELICIOUS!!! Best lemon meringue pie ever!!! You can find the recipe here.

Lemon Meringue Pie

Ingredients

  • 1 (9 inch) pie crust, baked (homemade, frozen, refrigerated...whatever you prefer)
  • 1 1/2 cups white sugar
  • 1/2 teaspoon salt
  • 1 1/2 cups water
  • 1/2 cup cornstarch
  • 1/3 cup water
  • 4 eggs, separated
  • 1/2 cup lemon juice
  • 2 teaspoons lemon zest
  • 3 tablespoons butter
  • 1/4 teaspoon salt
  • 1/2 cup white sugar

  • Directions
  1. Preheat oven to 325 degrees F (165 degrees C).
  2. Combine 1 1/2 cups sugar, salt, and 1 1/2 cups water in a heavy saucepan. Place over high heat and bring to a boil. In a small bowl, mix cornstarch and 1/3 cup water to make a smooth paste. Gradually whisk into boiling sugar mixture. Boil mixture until thick and clear, stirring constantly. Remove from heat.
  3. In a small bowl, whisk together egg yolks and lemon juice. Gradually whisk egg yolk mixture into hot sugar mixture. Return pan to heat and bring to a boil, stirring constantly. Remove from heat and stir in grated lemon rind and butter or margarine. Place mixture in refrigerator and cool until just lukewarm.
  4. In a large glass or metal bowl, combine egg whites and salt. Whip until foamy. Gradually add 1/2 cup sugar while continuing to whip. Beat until whites form stiff peaks. Stir about 3/4 cup of meringue into lukewarm filling. Spoon filling into baked pastry shell. Cover pie with remaining meringue.
  5. Bake in preheated oven for 15 minutes, until meringue is slightly brown. Cool on a rack at for at least 1 hour before cutting.

Amazing turkey and rub


(Sorry there's no picture, I don't have a fancy camera like everyone else in the blogging world!!)

Last year for Thanksgiving I couldn't find a rub that was what I was looking for, so I took a few different recipes and came up with my own. It is SO good! It always makes me feel good when my husband takes a bite of food and says, Oh yum! That's so good! He even made the comment for the first 3 or 4 bites of turkey! Yum! I used it again for our Thanksgiving Turkey this year. I wanted to brine my turkey using THIS recipe, but unfortunately, my grandpa unexpectedly passed away, so I found myself traveling for the 3 days before Thanksgiving. I got home Wednesday afternoon in time enough for a little bit of prep, then my hubby and I went to see Wicked!! Anyway, the bottom line is, this rub is so delicious, and it is so easy!! We will be making a turkey again for Christmas (I got a free one from my work!).

Mindy's Thanksgiving Turkey and Rub (I had a 18 lb turkey, so I doubled the rub)
Ingredients for the rub:
2 tsp garlic powder
1 tsp rosemary
1 tsp thyme
1 tsp parsley
1 tsp sage
1/2 tsp black pepper
2 tbs brown sugar
5 slices bacon (I use turkey bacon), cooked and crumbled
1 tbs Worcestershire

Other ingredients:
Turkey (whole, or turkey breast)
Carrots
Onion, sliced
Celery, diced
Worcestershire sauce, a few dashes
2 tbs butter
2 tbs flour (for your oven bag)
Oven/Turkey bag
1 cup water or chicken broth

1. Mix ingredients for the rub in a small bowl. I add the Worcestershire last. Use your hand to loosen the skin from the turkey (NOT frozen, I thaw in fridge for a few days before). Make sure that you don't remove the skin...you are just going to (literally) rub your rub between the turkey and the skin. Cover with plastic and return to the fridge for 4-24 hours (this is a rough estimate. If you don't have time, it's OKAY to rub the turkey and immediately cook it!)
2. Put flour into oven bag and shake around (this ensures that the bag doesn't burst). Place whole baby carrots, sliced onion, and diced celery in the bottom of the bag, and set into your roasting pan
3.Take your turkey and place on top of the veggies in the bag. Cut your 2 tbs of butter into several smaller pieces and press them onto the top of the turkey (on top of the skin). Sprinkle with a few dashes of Worcestershire sauce. Pour you water into the bottom of the bag. You can also sprinkle with a bit of salt and pepper as desired.
4. Tie your bag with the included ties. Cut a 6 2" slits into your bag (that's the directions that the oven bags I bought gave) to release steam. Place pan in the oven and cook according to the directions on your turkey (it depends on how large it is. I generally reduce the head by 25 degrees, and cook for an extra 30 minutes).
5. When finished, remove from oven and let sit for 15 minutes before carving. Make the most AMAZING gravy. YUM!

**You can also cook a turkey in the crockpot...just cover tightly with foil instead of using the lid!!! Prepare with rub as above. Place a crockpot liner in your crockpot. Put veggies and water in the bottom. Put turkey in and cover tightly with foil. I usually stick my meat thermometer right through the foil so I don't have to lift the foil and release heat. If your turkey has a pop-up timer, just note where it is at so you can notice it when it pops!


December 3, 2011

A Christmas Door Hanging

I decided I wanted something new hanging on my front door this year, something different and fun.  I had this old stocking, the red and white fuzzy ones that cost a dollar at most stores and a little Christmas teddy bear that I can never manage to find a home for... after a quick trip to the dollar store I whipped this up yesterday.


It's fun.  I don't think I've ever seen a stocking door hanging before.  It was super easy to make.
I picked up a few foam blocks from the dollar store and stuffed them down inside.  I wrapped one of them in Christmas paper and grabbed a candy cane from my yearly collection.  

So to start, stick something heavy in the toe of the stocking, to keep it hanging straight.  (I used an old padlock we lost the combination for.)  Then stuff the stocking with foam blocks to make it look bulky.  Take your stuffed animal, candycane, and wrapped box and arrange them in the top of the stocking.  Hot glue, or use another method of tacking, to tack it all down so it doesn't blow away in the next storm.  
You may need to safety pin the white cuff to the stocking, mine kept sliding upward.

That's it, it cost me about $2 to make and it took less than 1/2 hour.


Photobucket