

November 29, 2010
Mixed Boquet Quilt, Sneak Peak
I've been working on this quilt for months. And I'll admit it's kicking my butt! I'm a very new quilter. I've only been quilting for 2 years and this is my first advanced project. It's a lot harder to make it perfect that I thought it would be. The finished quilt will have 20 "mixed boquets" in it. I have 10 done and couple more cut and waiting to be sewn. Here's a sneak peak of the blocks I've finished.

Beef Enchiladas
My husband and I love mexican food. However, I'm not the greatest mexican cook. I found this recipe for Beef Enchiladas and my family LOVES it. It was super easy to make and so so yummy. My 2 year old even liked it. ☺

You'll Need:
Tortillas (I used taco size, next time I'll buy them slightly smaller)
2 10 oz cans Enchilada Sauce
1 1/2 C. Shredded Cheese
1 can Refried Beans
1 lb Ground Beef
Hot Cooked Rice
Prepare Rice. Brown beef while rice is cooking, drain fat. Add 1/3 of 1 can Enchilada Sauce, 1/2 the cheese 1/2 can of Refried Beans and 1/2 C. Cooked Rice. Stir until well combined and cheese is melted. Spoon filling into tortillas, place is shallow baking pan, cover with remaining sauce and cheese. Bake at 350° until cheese is melted, about 10 min or so. Serve with remaining rice and beans.
November 28, 2010
Perfect Pumpkin Pie
I know it seems a little bit late for this post... seem Thanksgiving was several days ago and all, but I never got around to making my pie until Thanksgiving day.
I use the Williams-Sonoma Pie Crust Recipe. It's by far the best I've ever had.
This recipe makes 3 crusts which can be used with any pie.
 You Will Need:
4 C. Flour
1 tsp. Salt
1 1/2 C. Unsalted Butter, cut into cubes
3/4 C. Ice Water
Combine flour and salt in a food processor, pulse briefly to combine. Scatter butter over the top and pulse until mixture forms coarse crumbs about the size of peas. Drizzle ice water over flour and pulse until dough starts to come together. Transfer to work surface and divide into 3 equal portions and flatten into discs. For future use wrap the discs and freeze up to 1 month.
Pumpkin Pie Recipe:
3 Eggs
3/4 C. Brown Sugar
1/2 tsp. Cinnamon
1/2 tsp. Ginger
1/4 tsp. Allspice
1/2 tsp. Salt
1 3/4 C. Pureed Pumpkin or 1 15 oz. can of Pumpkin Puree
1 1/2 C. Milk
 Preheat oven to 425°. Roll 1 dough disk to make a 12" circle. Carefully transfer to a 9" pie pan. Ease crust into pan, careful not to tear the crust. Cut overhang to 1".
 Next fold the overhang on top of itself about 1/2 way to the pan rim.
 Fold overhang to rim and press firmly. Poke a few holes in the bottom of the crust to help keep it from bubbling up during baking.
 If your paranoid about your crust bubbling up and folding in on itself like I am (I've had one to many pies ruined that way. So I take precautions!) If you're like me just snuggly fit another pie pan inside your crust during baking. If you notice the crust bubbling and pushing the second pan up you can fill the pan with rice or beans to weigh it down. The crust might bubble up a little under the pan but as long as it doesn't push the pan up it'll be fine.
 Put your shell in the freezer for 5 minutes. Remove it from the freezer and place it directly in the oven. Bake for 10 minutes. Remove and cool completely on an iron rack.
While your crust is cooling prepare your filling.
Whisk your eggs until blended. Add sugar, cinnamon, ginger, allspice and salt. Mix well. Mix in puree and milk. Pour into partially baked shell.
 Bake the pie at 375° for 35-40 minutes. Cool briefly on wire rack. Serve with whipped cream if desired.
I use the Williams-Sonoma Pie Crust Recipe. It's by far the best I've ever had.
This recipe makes 3 crusts which can be used with any pie.

4 C. Flour
1 tsp. Salt
1 1/2 C. Unsalted Butter, cut into cubes
3/4 C. Ice Water
Combine flour and salt in a food processor, pulse briefly to combine. Scatter butter over the top and pulse until mixture forms coarse crumbs about the size of peas. Drizzle ice water over flour and pulse until dough starts to come together. Transfer to work surface and divide into 3 equal portions and flatten into discs. For future use wrap the discs and freeze up to 1 month.
Pumpkin Pie Recipe:
3 Eggs
3/4 C. Brown Sugar
1/2 tsp. Cinnamon
1/2 tsp. Ginger
1/4 tsp. Allspice
1/2 tsp. Salt
1 3/4 C. Pureed Pumpkin or 1 15 oz. can of Pumpkin Puree
1 1/2 C. Milk


While your crust is cooling prepare your filling.
Whisk your eggs until blended. Add sugar, cinnamon, ginger, allspice and salt. Mix well. Mix in puree and milk. Pour into partially baked shell.

November 25, 2010
Happy Thanksgiving!
Just wanted to take a moment to wish a Happy Thanksgiving to all our followers and friends! I hope your turkey was nice and juicy this year!
We've been kinda slow on the posting but we'll get with it soon! Promise!
We've been kinda slow on the posting but we'll get with it soon! Promise!
November 13, 2010
Beef 'n' Pea Pod Stir-fry

You Need:
1 lb Sirloin Steak
1 Clove Garlic
1 Tbsp. Vegetable Oil
¼ tsp. Salt
Dash of Pepper
2/3 C. Beef Broth
1 Tbsp. Cornstarch
2 Tbsp. Water
1 Tbsp. Soy Sauce
¼ tsp. Ginger
6 oz. Snow Peas
Cut beef into ¼” slices. Heat skillet over high heat. Add oil to hot skillet. Add beef and garlic. Stir-fry for 3 min. lifting and turning until beef is brown. Sprinkle beef with Salt and Pepper, add broth. Mix cornstarch, water, soy sauce and stir into beef. Cook until boiling, boil 1 min, stirring constantly. Sauce will be thin. Stir in ginger and pea pods. Cook uncovered 2 min, stirring occasionally until pea pods are crisp tender. Serve over rice.
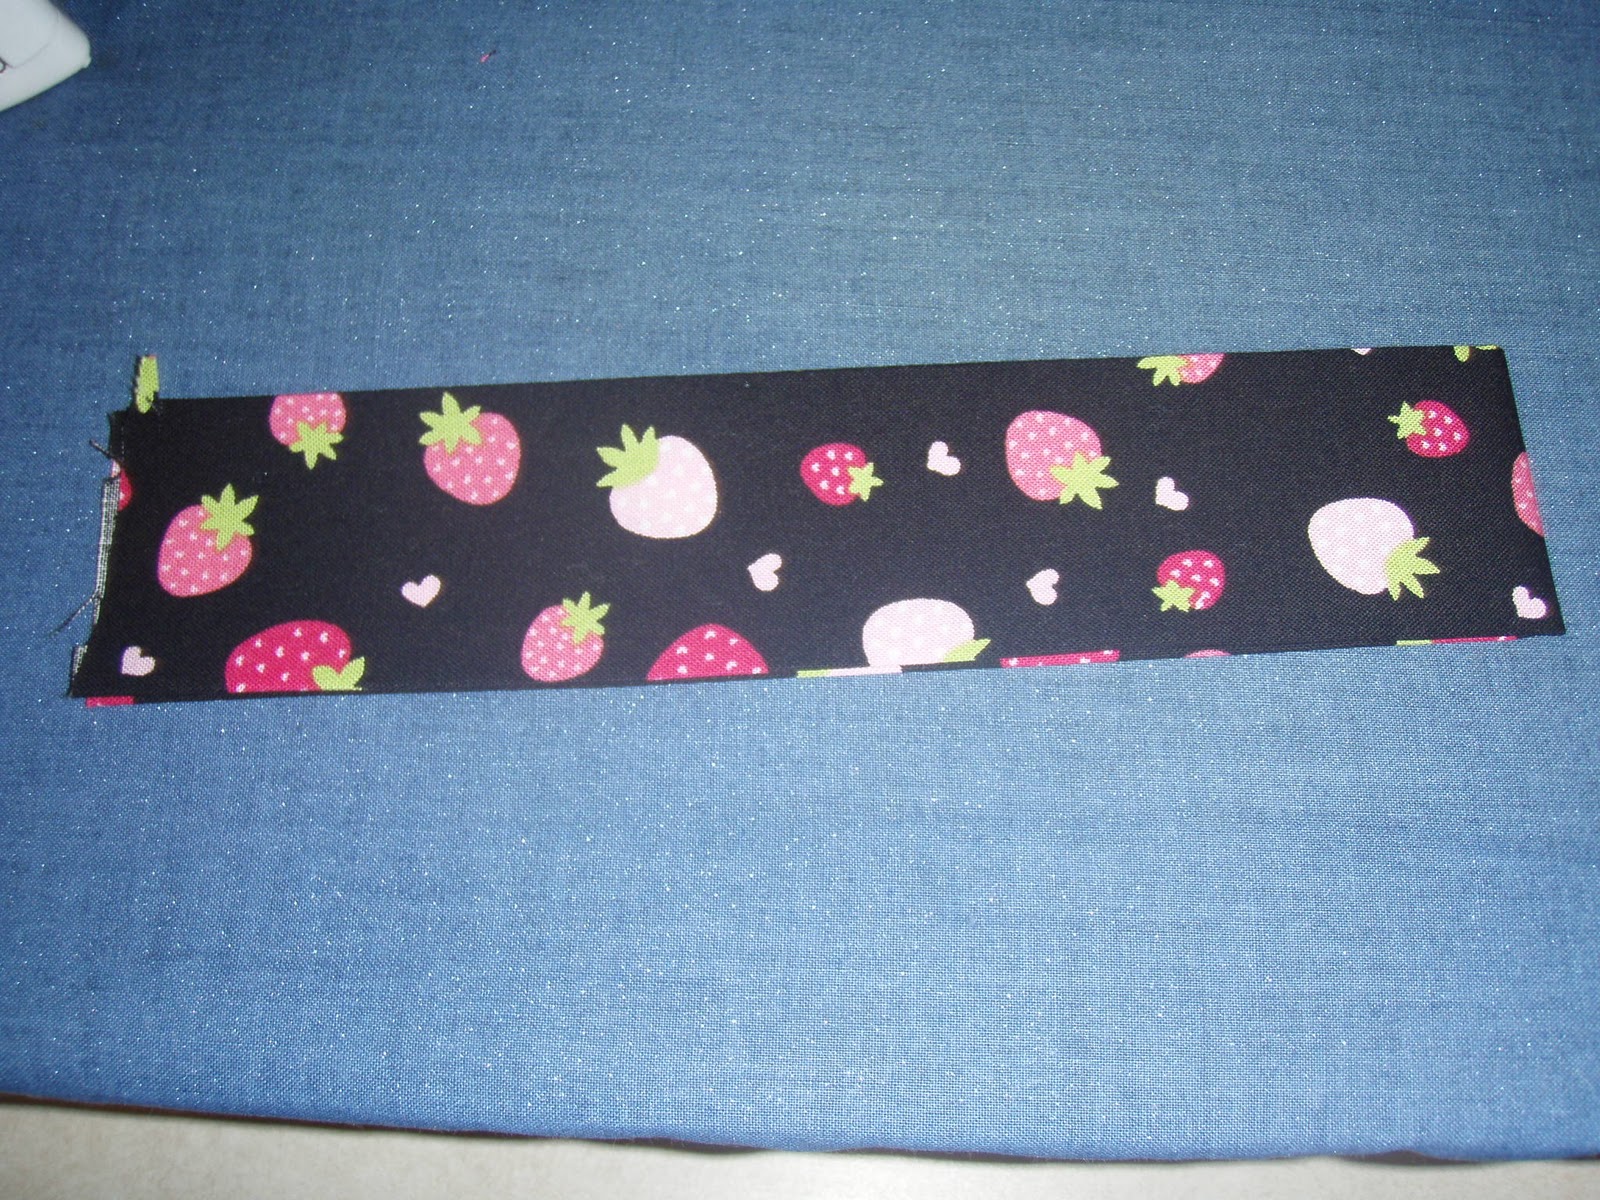
Million Pillowcase Challenge
American Patchwork and Quilting has come up with a One Million Pillowcase Challenge, basically they want america to make one million pillowcases and donate them to any local charity before the end of the calendar year. I decided to participate, I've also challenged the Young Women and Relief Society (any everyone else) in my ward of the Church Of Jesus Christ of Latter Day Saints to participate.
I made my pillowcases yesterday. All the pillowcases I collect will be donated to the Operation Support for Deployed Military at the end of the month.
Making a Pillow case is SO Easy. I followed the pattern found here. I had a lot of fun picking my fabrics and the pillowcases seriously took less than 10 minutes each. So Easy. I'd encourage everyone out there to go pick a couple fabrics and make a couple pillowcases, donate them to any local charity accepting pillowcases then go to the Million Pillowcase Website at the top of this page and add your pillowcases to the counter!


November 10, 2010
Little Rocking Chair Pad
My Great Grandmother, Myrtle Millard, (yes that was her name, if you think I'm joking I'm not.) She was an amazing woman, I wish I knew her secrets. When I was a very little girl, about my daughters age, she made a seat cover for a rocking chair that was just my size. My daughter know has that same rocking chair, and that same 80's orange and green chair pad. If you look closely at some of the pictures taken in my daughters pink room I'm sure you might see what I mean. I'm sure it was all the style when I was a young child, but not any more. *sorry Grandma!*
So I made it new today.
 I started by cutting my pieces:
2 rectangles for the front and back of seat
2 thick strips for the top straps
4 thin strips for the seat ties
 Then I folded the edges in to make the edge look nice and straight. I pressed this.
Then I folded them in half, length ways for the top straps and short ways for the seat ties.
 I then put a zig-zag stitch down both sides of the top straps and a straight stitch straight down the edge of the seat ties.
After that I put my batting in between the front and back pieces and pinned all my ties and straps were I needed them. I zig-zag stitched all the way around the the edge. Then I made zig-zag stitches straight through the fabric to make a seat and a little head rest.
 Here's the finished result. I think it looks much better.
 I tied the seat down and tied a pretty bow on each side.
 The back straps are saftey pinned on, for easy removal and cleaning purposes. ☺
So I made it new today.

2 rectangles for the front and back of seat
2 thick strips for the top straps
4 thin strips for the seat ties

 |

After that I put my batting in between the front and back pieces and pinned all my ties and straps were I needed them. I zig-zag stitched all the way around the the edge. Then I made zig-zag stitches straight through the fabric to make a seat and a little head rest.


Bed Pillow
When I made my sofa pillows a few months ago, I also made a decorative bed pillow for my daughters bed, it matches my Lemon Bars quilt.

It was a very simple pillow to make. I followed the basic instructions for the Sofa Pillows, You can find those here. The only difference in design is that I pieced a pattern on the front block of the pillow. The rest of the instructions are the same.


It was a very simple pillow to make. I followed the basic instructions for the Sofa Pillows, You can find those here. The only difference in design is that I pieced a pattern on the front block of the pillow. The rest of the instructions are the same.

She really likes it ☺
Musical Pinwheel Quilt
My little sister's favorite colors are Red, Black, and White. When she graduated high school I made her this lap quilt.

 The block pinwheels.
 The stitching in the black and white polka-dot blocks. This is why I call it the "musical" pinwheel quilt.
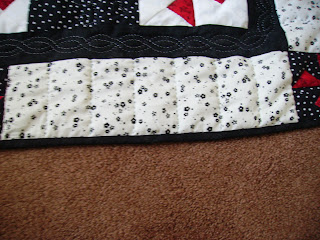 The inner and outter border stitching.
 The backing of the quilt is a black and white flower print. It's very fuzzy in every picture I took!

The original pattern I used was "Sweet Tweet" by Anne Sutton, I just changed the colors and removed the applique, in the end it turns out to be a simple pinwheel quilt.


Baby Crib Bumper
This bumper was SO EASY to make! Seriously. I made this bumper in a week, and it shouldn't have even taken that long!

I had not used a bumper for about the first nine months of my baby's life, I've heard too many horror stories of bumpers being connected with SID's. However, after my baby could sit, roll, crawl, and pull herself up to standing I wasn't so parianoid anymore. She started kicking the bars on her crib and getting her chubby little legs stuck inbetween the bars! One time she got them stuck so good I had to oil her legs to slip them back through the bars! This was the day I decided to make a baby bumper.
 I had no pattern to make this bumper, I simply measured the sides of the crip and connected my fabric stips end to end to achieve the right length. I made my bumper one foot tall. I added my batting and stitched straight lines about every 8" just to hold it together. I bound it with a conitnious binding with mitered corners, just as I would a quilt and attached some fabric strips to it so I could tie it to the crib.
It was that easy.

I had not used a bumper for about the first nine months of my baby's life, I've heard too many horror stories of bumpers being connected with SID's. However, after my baby could sit, roll, crawl, and pull herself up to standing I wasn't so parianoid anymore. She started kicking the bars on her crib and getting her chubby little legs stuck inbetween the bars! One time she got them stuck so good I had to oil her legs to slip them back through the bars! This was the day I decided to make a baby bumper.

It was that easy.
Mountain Wall Hanging
This quilt is my absolute favorite! Possibly because it has great sentimental value, it is my very first quilt. You could say that this quilt is the one that started it all. My husband is in the USCG and he was ordered to a training school. He was going to be gone for nearly 4 full months so I moved from Seattle Wa, where we were living at the time, back to Bountiful Utah, where our families were. While I was there my mother-in-law taught me how to quilt. I made this quilt for my husband and I to hang in our house in our new home.
 This quilt is pretty much entirely applique. I had a lot of fun with it too!
The orginal pattern (I'm not sure where my MIL found the pattern) had 3 hearts in the center block. I didn't like it like that so I replaced the hearts with a tent, some bears and a camp fire. I think it is much more fitting for my house and my family.
I made an identical quilt for my Dad for his vacation house. The colors are much more bright, and the borders are green instead of red. I don't have a picture of that quilt... I forgot to take one before I gave it to him and he hasn't had a chance to send me a picture yet. Hopefully I'll get one soon.
*Dad if you're reading this, I'd really like a picture* ☺
Keep Your Sunny Side Up
I made this tablerunner for my Mom. My Mom LOVES sunflowers, so when I saw the tablerunner in a magazine I knew it would be perfect! I looked up the company on line and found the free pattern. It's called Keep Your Sunny Side Up and it was created by Ro Gregg. All I did was change the colors.


 The flower in the center of this block is all applique.
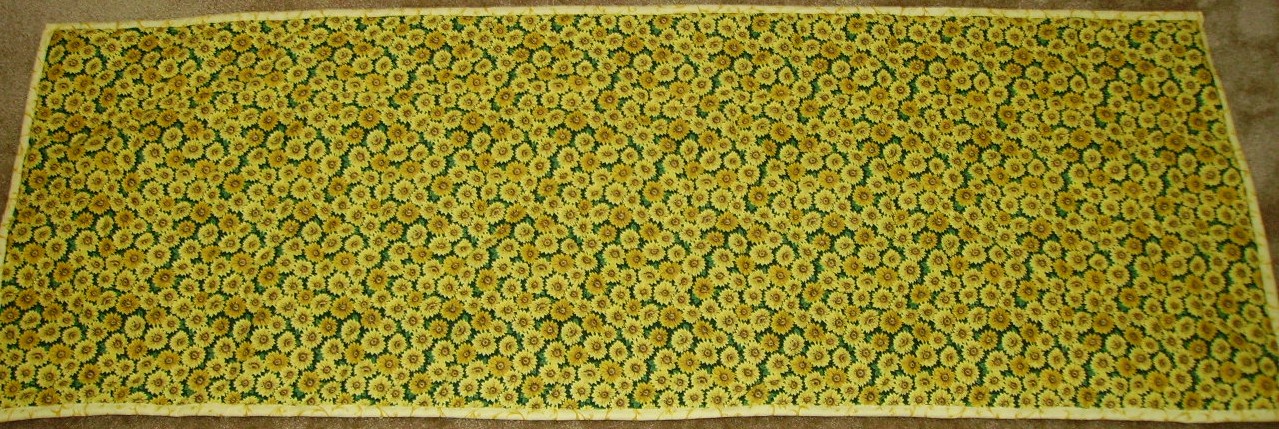 The backing is a yellow and green sunflower print.
I love this tablerunner. My mom took it to my parents vacation house in the countryside. I love walking into that house and seeing this tablerunner on the kitchen table. ☺
Butterfly Baby Quilt
I made this quilt for my baby. I finished it about two weeks before she was born and it took me about a total of a month to make. I came up with the pattern for this one myself, my first attempt at creating a quilt from scratch. It didn't turn out too bad.

 All the flowers and butterflies are appliqued.
All the stitching on the quilt was done by hand.
The blocks are stitched with a straight diagonal line through each.
 The antennas on the butterfly are hand stitched with thick brown thread. I've hand stitched around each butterfly and flower.
 The border stitch is a 6 petal flower. (this is one of my two favorite stitches I've done ☺)
 The back is a shimmery butterfly pattern. I loved this print when I saw it in the store and I had to have it. However, in retrospect I wish I would have used a softer fabric for my baby's quilt. Oh well. Live and Learn.


All the stitching on the quilt was done by hand.
The blocks are stitched with a straight diagonal line through each.


Lemon Bars Quilt
I made this quilt for my daughter's bed. It was pretty simple too. I started this quilt the weekend after my baby was born so it took me a bit longer to get it pieced, about 3 months. I was given the opportunity to use a friends HQ Longarm Quilting Machine to quilt it. It was a whole lot of fun to use that machine, it's also a lot trickier than it looks! It took me 3 or 4 hours to quilt the entire quilt, versus the 3 or 4 months it would have taken me to put a simple hand stitch in the quilt. Anyway here's the finished product:

 The basis of the quilt is made of little squares and rectangles. Fairly simple to piece.
 The small squares and rectangles are then pieced into a 15" block. There are 20 blocks in this quilt to make it into a twin sized quilt.
I had a lot of fun turning the blocks to create different patterns and finally decided on the one you see. The blocks are then pieced in strips then the strips are pieced together to make the top. The backing is a pink and white stripped flannel.
 It's stitched with a wandering 4 petal flower and loop-de-do's.
Here's the finished product on her bed. The drop of the quilt is long enough that when we move her to a full sized box-spring it will hang down like it should.

The original pattern for this quilt was found on allpeoplequilt.com. I just changed the layout of the blocks, the size, and the colors, of course.


I had a lot of fun turning the blocks to create different patterns and finally decided on the one you see. The blocks are then pieced in strips then the strips are pieced together to make the top. The backing is a pink and white stripped flannel.

Here's the finished product on her bed. The drop of the quilt is long enough that when we move her to a full sized box-spring it will hang down like it should.
November 8, 2010
Chore Charts
I actually stole my basic idea from Kristie's Calendar Post. ☺
I made chore charts for myself and my toddler.
 They really aren't anything fancy. I just got some posterboard and cut it to size. I drew my lines and words with pencil then went over them with marker. Life tends to get hecktic and there is simply not enough room on my calendar to list everything that needs to get done. I find that if I have a list that I can pysically see, it helps me to remember everything I need to get done in a day, week or just in general. There is also extra space at the bottom where I can list things I need from the store, or other things that come up that I need to remember. It works for me. ☺
 As for my daughter, well, she's motivated by stickers. I thought to myself "I bet she'll do her chores for stickers, and if she has a special place to put them, that's even better!" I've only had this finished for one day and my daughter is so excited to find out what else she has to do to get a sticker!
On my daughters chart I left the chore column empty when I laminated it because she's only 2, so her chores involve: brushing her teeth, and picking up little pieces of garbage, etc.. where in a couple years she will have bigger chores. ☺ mommy's excited for that!
I made chore charts for myself and my toddler.


On my daughters chart I left the chore column empty when I laminated it because she's only 2, so her chores involve: brushing her teeth, and picking up little pieces of garbage, etc.. where in a couple years she will have bigger chores. ☺ mommy's excited for that!
November 6, 2010
Can't Paint Your Walls?
I have an itch, a very persistant itch to paint the walls in my house. They're white, I hate white walls. The whole reason I haven't painted them yet is cause my husband is looking at a possible transfer soon and we might be selling our house. So we're not painting until we find out if we're staying. If we're leaving, the walls will stay white. Seems I can't paint the walls in my house I had to do something! Everything was white!


 She has a picture frame in her room that has words written on glass with no background. I decided to put a piece of fabric, one I'm using for her quilt, behind it to give it some color. The picture makes it a bit harder to read than it is in reality.
 I've also made her a memory board.
 I've made her some curtains... they are a teal colored with brown, green, and white askteric like decorations on it. It's really cute fabric.
 And I painted her dresser. This dresser has been several colors over the years, when it was in my toddler's room last year it was purple. Now it's an aqua teal and we replaced the pink and yellow handles with black ones and now it's as good as new!
Being in desperate need for color I picked a color scheme for both of my girls's rooms. My toddler's room is colored in pink, blue, and purple. My baby's room is converting to a color scheme of Aqua blue with splashes of brown, green, and black.
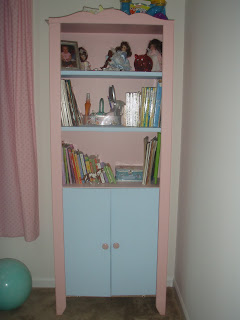
For my toddler's room I:

Made her a quilt: Lemon Bars, a Matching Pillow, and a bedskirt

Made curtains of a pink polka-dot fabric.

Made a memory board for her pictures.

And Painted her Bookshelf. It used to be white, big surprise huh?
I love how this turned out and most of all my daughter thinks it's great!
My baby's room is moving a bit slower than my toddlers room. Mostly because the baby stuff is not in any particular color scheme, and I'm not buying all new baby accessories just because I want a color scheme! The second reason it's moving a lot slower is cause her quilt is a bit more complicated than any other quilt I've made. It's taking me a while to make it cause I want it to be perfect. What I've done so far:
 She has a picture frame in her room that has words written on glass with no background. I decided to put a piece of fabric, one I'm using for her quilt, behind it to give it some color. The picture makes it a bit harder to read than it is in reality.
 I've also made her a memory board.
 I've made her some curtains... they are a teal colored with brown, green, and white askteric like decorations on it. It's really cute fabric.
 And I painted her dresser. This dresser has been several colors over the years, when it was in my toddler's room last year it was purple. Now it's an aqua teal and we replaced the pink and yellow handles with black ones and now it's as good as new!
I have a goal of June to finish my baby's quilt and once we move the baby stuff out it'll just as I wanted it!
Subscribe to:
Posts (Atom)