January 31, 2011

E's Quilt (Step 1 and 2)

I have a really hard time with quilts...for several reasons, but mostly because I am indecisive. So the whole process of picking fabric and picking a design/layout of the quilt takes me awhile. Once I have those 2 steps down, the quilt goes pretty quickly for me, but getting to that point is the trick. I finally picked some fabric (Thanks Mom for helping me decide!), got it washed and cut out. Now on to the pattern.......I tried a few different ones and I think I like this one best...

(Sorry the lighting was weird.....)
What do you think? Does the striped fabric look ok with some going vertical and some horizontal? Do the 2 circle-ly fabrics look ok next to each other?

I also am putting a 6 or 7 inch border of the plainer looking pink fabric around the whole quilt. I will post more pictures once I get past step 2! :) Wish me luck! :)

Vinyl Lettering Projects

I'm having a lot of fun with my new Silhouette SD.  I keep asking myself what other projects I can do with the limited material I have to work with.  I've found a few.  I went ahead and ordered myself some black vinyl (seems all my walls are white) and can you believe it, they just came out with an interfacing that allows you to cut FABRIC with your silhouette!  I'm stoked!  It will make applique quilts so much easier!  I ordered some of that too.  ☺

Anyway I wanted to show you my newest projects:


This one in on the wall above my shower:


I think it's fun. It's about 2 feet long and 8" tall.  Everyone I tell about this laughs at the boldness of it.
Last time I checked everybody gets naked before they shower... I'm just saying. 
 It's not like I put it over the bed in the Master bedroom where it might appear a little more provocative.


Anyway my second project that I want to show you is this:


This is my scrapbook. Well, technically, it's my husband's scrap book.  I put all of his Coast Guard "stuff" in here. 
For 3 years I've wanted to find some silver leafing I could press on the front and I just couldn't find any!  So I just cut the letters out of vinyl and stuck them on the front!  So easy. 

I might order some nice silver vinyl if I can find some and replace the letters down the road, but for now this makes me happy.

Flower Garden Quilt

I finished piecing one of my quilts this weekend.  The quilt I have referred to in the past as Mixed Boquet.  (I decided to change the name just because I can.)  It kinda looks (to me at least) like flowers growing out of the grass.... so it's my flower garden quilt now.  Anyway I'm very happy with the way it turned out.
Honestly I'd say this quilt is the closest to perfect I've done yet, everything came together nicely.


When I made my Lemon Bars quilt for my oldest daughter my Mother-in-law helped me quilt it so she has one quilt from Mommy and Grandma instead of 2 quilts.  The case is the same with this quilt.  It'll be quilted by my Mother-in-law in a couple months or so.  I'll post the finished project after it's done so you can see.

January 28, 2011

Bad Day + Chocolate Muffins = Better Day.

An event occurred last night... an event that made me very upset.  Very frustrated at one particular person.  I had a restless sleep, and woke up this morning in a very bad mood.  I tried relaxing but anyone who is a mother out there understands how hard that is with one 2 year old, one 1 year old and one 9 months baby.  My 2 year old flooded the bathroom sink while I was baking (didn't realize she was playing in the bathroom) To top it off I sit down to write this post and my computer chair falls apart and I go tumbling to the floor.  It's just one of those days.  So when I checked my facebook status this morning I found that http://www.joyofbaking.com/ had posted what appeared to be a delicious chocolate muffin recipe.

Chocolate will cure anything.  I'm absoutely sure of it.

So I made them:


I'm eating the first one right now and oh boy I feel better already.
The only difference between mine and theirs is that I used white chips instead of chocolate.

Here's the link to the recipe if you'd like to try it.

Enjoy.

Check Out My New Toy!

A few months ago I heard about a machine called "Silhouette SD" (yeah I only heard about it a couple months ago... I live in a box)  (Do you live in a box too?  A Silhouette SD is a cutting machine, it cuts what a normal printer would print.  It can cut vinyl and paper and all kinds of cool stuff.)  Anyway, I got so excited that I saved my pennies and I bought one last week.  I waited and I waited and I waited.  Yesterday it finally came.  ☺  I'm stoked.  I've already done 2 projects, one of which was a test project and it'll be replaced soon so I didn't even take a picture of that one.  But here's the vinyl cut out I made for my laundry room.  It's right above my washer.


I have learned one thing already though.  Make a double cut.  Better safe than sorry.  I had to take my scissors to a couple spots (top of the U and the little Y) to get them off.

But  I'm In Love.

January 27, 2011

Best Pizza EVER!, no I'm serious.

Last night for dinner I made pizza,  I was going to order it, but somehow my husband managed to convince me to make it instead.  And it turned out Amazing!  I might not ever order pizza again.  Anyway if you'd like to try it, which you should cause it truly was amazing!  Here's the recipe:  Make the sauce first cause it needs to sit to absorb the flavor of the spices.


Sauce:
12 oz. Tomato Paste
1 1/2 C. Warm Water
1/4 C. + 2 Tbsp. Grated Parmesan Cheese
2 tsp. Minced Garlic
1/4 C. Honey
1/2 tsp. Oregano
1/2 tsp. Marjoram
1/2 tsp. Basil
1/2 tsp. Black Pepper
1/8 to 1/4 tsp. Cayenne Pepper (use less to make it less spicy)
1/8 to 1/4 tsp. Red Pepper Flakes (use less to make it less spicy)
Salt to taste

Combine All ingredients in bowl and whisk well.  Let stand for 30 minutes.  Any remaining sauce can be put in a mason jar and stored in the fridge for about a week.

Crust:
1 (1/4oz) Package Active Dry Yeast
1 tsp. White Sugar
1 C. Warm Water
2 1/2 C. Flour
2 Tbsp.  Olive Oil
1 tsp. Salt
Cornmeal
In a medium mixing bowl, dissolve yeast and sugar in water.  Let stand 10 minutes.  Stir in flour, salt and oil.  Beat until smooth let it stand for 5 minutes.  Roll it to the size of your pizza on a smooth surface lightly dusted with cornmeal.  Transfer to baking pan and fold edges up to make a nice crust.  *try using a pizza crisper (the pan with all the little holes in the bottom) it will make the crust less soggy*

Top crust with desired amount of sauce, any toppings, and mozzarella cheese.  Bake at 450° for 15 minutes or until crust is light brown and cheese is melted.

*Have you ever tried bacon tomato pizza?  It's my personal favorite.  Precook your bacon for about 5 minutes just enough to get most of the grease out, chop up tomato and bacon and put under your cheese on your pizza.  It's pretty amazing.*

Anyway that's my secret behind my amazing pizza.  I hope you find it as wonderful as I did.

The original recipes for the sauce and the crust came from allrecipes.com  I haven't changed the crust recipe at all, but the sauce recipe I adjusted a little bit.
Crust: http://allrecipes.com//Recipe/quick-and-easy-pizza-crust/Detail.aspx
Sauce: http://allrecipes.com//Recipe/exquisite-pizza-sauce/Detail.aspx

January 24, 2011

Great Granola Bars!

I'm trying to figure out this whole "nutrition" thing, for myself and my family.  It's been hard.  It's a lot more complicated than people make it out to be.  Anyway the biggest struggle for me has been snack time.  (My kids are 1 and 2 1/2)  What do kids eat these days anyway?  I got this crazy idea to make granola bars.  I never buy them cause they're so freaking expensive!  I found this great recipe and made them the other day.  What A Hit!  The kids LOVE them.  Not to mention myself and my husband love them as well.  The best part, they're pretty healthy. ( I think)  Anyway.

(This picture is pre-cooked.  Once again I forgot to take after pictures.)
(click link to get orginal recipe)

4 1/2 cups rolled oats
1 cup all-purpose flour
1 teaspoon baking soda
1 teaspoon vanilla extract
2/3 cup butter, softened
1/2 cup honey
1/3 cup packed brown sugar
2 cups craisins


Lightly grease one 9x13 inch pan. In a large mixing bowl combine the oats, flour, baking soda, vanilla, butter, honey and brown sugar. Stir in the craisins.  Lightly press mixture into the prepared pan. Bake at 325° for 9 minutes, remove and press once again.  Return to oven for 10-12 minutes or until golden brown. Let cool for 10 minutes then cut into bars. Let bars cool completely in pan before removing or serving.

Spicy Crock-Pot Roundsteak

Thanks to everyone who voted on last weeks dinner poll.  Here is the winning recipe.
I'm trying to be better about putting sources on each of my recipes... I have so many and I've had a lot for a very long time and I tend to forget where I got the orginal recipe.  This one... I don't have the foggiest idea where the orginal came from.  My Mom has been making this dinner for years!  Like since I was little, very little.  So I will call it a "family recipe."

Anyway here it is.

Spicy Crock-Pot Roundsteak

1 lb Round Steak
3/4 C. Ketchup
3/4 C. Water
2 Tbsp. Vinegar
1 tsp. Paprika
1 tsp. Chili Powder
1 tsp. Salt
1/2 tsp. Black Pepper
Hot Cooked Rice

(this is for a moderate spice, which is very flavorful with just the right amout of kick.  If you like it Really spicy just add more spices, for less spicy cut the measurments for spices in half.)

Add all ingredients to Crock-Pot and cook on slow for 6 hours.
Serve over Rice.
Goes Really Good with Green Beans

Bacon Onion Beef Brisket (In the Crock-pot)

A few weeks ago I posted the most delicious recipe for beef brisket.  If you remember, then you'll know I forgot a picture of that delicious meal.  Well I made it again this weekend, this time I put in the Crock-Pot.  And I remembered to take a picture!  Yay!

(it looks good huh?)

Bacon Onion Beef Brisket
Crock-Pot Version

1 Large Onion, sliced
3 tsp. Minced Garlic
2 Tbsp. Balsamic Vinegar
1/4Cup Beef Broth
3 1/2 lbs Beef Brisket
1/2 tsp. Pepper
6 Thick Slices Smoked Bacon, chopped


Rub Pepper on Brisket, stick in bottom of crockpot.  Top with all remaining ingredients.  Cook on low 8 hours.

And that's it.  It's so easy isn't it?  I love my crock-pot.

January 22, 2011

An Exciting Discovery

I have made and exciting discovery.  A website called http://www.joyofbaking.com/
If you like baking you should check it out.
I see lots of yummy things in my future.
Smore Granola Bars
Boston Cream Pie
Pavlova
and
SO
MUCH
MORE!
I'm pretty excited about it.

January 21, 2011

Simple Trick to Clean Sterling Silver

Do you know how to clean Sterling Silver?  Well if you don't, you will by the time you finish reading this.
I have to buy all my jewerly in sterling silver because I'm allergic to nickle (most cheap jewerly is made from nickle) The problem with Sterling Silver is that it tarnishes really easily.  So every now and then I pull out all my earring and necklaces and bracelets and I clean them.


You'd need:
Baking Powder
Water
Aluminum Foil
Bowl
Smaller Bowl
Scrubby Brush

Place aluminum foil inside bowl, shinny side up, place all your tarnished items inside.
In a smaller bowl combine 1 Tbsp Baking Soda and 1 C. Water, mix and pour over items in bowl.  Let your items soak for a few minutes.


In the smaller bowl mix 1 Tbsp. Baking Soda and very little water to make a nice paste.  Pull your items one at a time out of the soaking mixture and rub some paste on them.  Scrub with brush and rinse in water.  Set them to dry.  You'll notice the difference as soon as you rinse the paste off.

It's as easy as that.

I Won I Won I Won!

Take a look at the cool quilting book I won from Conntecting Threads (my favorite ever online fabric store).


(It's Edyta Sitar's latest quilting book titled Friendship Strips and Scraps)
It has 18 AMAZING quilts inside and they are all so beautiful!  I wish I had a fortune to go by fabric right now so I could make every single one of them!

I did have favorties though.  Would you like to see what I might be making in the future?
Me too!

This is the first one:


I think I love this one because it's so simple!  Yet so elegant.  I'm in love.


And this table runner.  Stunning.  I think it's georgeous!

I'm just so excited to have won something.  I can't wait to get started!

January 20, 2011

This Weeks Poll Results

If you haven't looked yet, the winner of our dinner poll was Spicy Crock-pot Round steak.  I'm actually excited because I LOVE this dinner.  I'm not a huge fan of spicy, but I will eat every bite of this dinner. 
It's on the menu and I'll make it soon and tell you all about it!

In the meantime take a look at the new recipe choices found in the upper left side of the blog and pick the one you want to see me post about. 

I hope some of you are actually making these dinners, it's good to try new things.

January 17, 2011

More Flower Hair Clips

Need a new headband or hair clip? Try making this one!
You will need:
silky like fabric scraps
a candle
pearl beads
hot glue
ribbon (if you want to make a headband)
elastic (for headband)

First cut out a bunch of circles in different sizes. I made this one a stack of 5. The smaller ones are stacks of 3.
Light your candle.....I found this easier than using a match
Then melt the edges of each of the circles
Then I burned my finger and decided that using tweezers might be a better idea. :)
As the edges burn then should curl up like this
After you have melted the edges you will want to hot glue the different layers together.

Then you can hot glue pearls or whatever you so desire in the center. Then glue a hair clip or headband on the back.

If you want to make a headband, then measure around your head with ribbon. I cut mine an inch or 2 short and then folded the edge down and sewed a small strip of elastic to both ends.

And now you have a cute new hairclip or headband!

Portable Changing Station (This time with pictures)

You will need:
A flexible place mat
velcro
1/4 yd. fabric
elastic
decorative elements if you so choose

First you will need to fold up the bottom of your place mat. ( I used one of the small travel sized wipes container for my measurements.) Also if your place mat needs it, fold the top down and hem it.
Then sew up the fold on the 2 ends. Then fold your place mat into thirds and then sew a seam up to the egde of your fold so you have 3 pockets.
Then you will need to make a pocket out of your fabric that will fit on the side of your place mat. I just folded a piece of fabric not quite in half and sewed up the sides. Then then I hemed the top and bottom.
Once you fold it right side out it should look like this.
Then I sewed the pocket onto the left side of the place mat. Then on the right side on the place mat I added a piece of elastic so that it will help keep the diapers in the pocket so they don't fall out. (I forgot to take a picture of this.....let me know if you can't figure it out) Then for the changing pad I cut a waterproof matress pad into 4ths and used a 4th of it as my changing pad. you can also make one out of fabric or use an already existing changing pad. I attached a piece of velrco to the back of mine so I can take it out and wash it as needed.
Then I folded the placemat back into thirds (make sure you put your wipes container and a couple diapers in it for measurements) Once it is in thirds you can make a strap that goes around and holds the whole thing together. I used velcro on the end to attach mine.
And Volia! You have a super cool portable changing station!

January 16, 2011

Operation Color: Successful

I Finally Got to Paint!  It was a lot of fun.  It took me a whole day, juggling 3 kids (my own 2 plus the one little boy I babysit).  But It's done!  I'll be perfectly honest, this was my first ever "on my own" paint job.  And about my 2nd ever paint job.  So considering I have a significant lack of experience it turned out pretty good.

This picture makes our bathroom look all dim and romantic...
It's not actually this dark.

This is above our shower, and it shows pretty close to the real color of the room. 

This is a little closer to what the room looks like..

This picture makes it looks really light.

My husband and I love it.  The paint is the same color as our bed-spread in our master bedroom, so it kinda works perfectly for us.  I'll be adding furniture to this room, a wall shelf above the toilet for my little decorations... and a linen cupboard on the long wall across from the shower (it's acutally a really big empty wall next to the sink there.)  I think I'm even going to have a nice frame made for my mirror and probably re-frame my wildlife pictures to match.  All the furniture will be wooden with a natural finish.
I might try to find a couple more small framed pictures for the walls too,but I haven't decided yet.

January 14, 2011

Window Valances

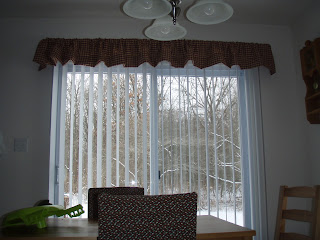
I Finally Got around to this project.  It's been sitting on my sewing table for over a year now.  I hung my window valances today.  What Do Ya Think?

Above: Finished Valance Size is 105"x10"

Above: Finished Valance 160"x 10"

Above: Finished Valance is 75"x10"

I like them.  The one over the small window is hanging funny on one side and I need to figure out why it won't hang right... but other than that.  It's nice to have a little color up against these white white walls!
My house is finally starting to feel like a home.

If you'd like to know how I did it:

Cut your fabric according to the diagram below:

This is for a window that is 70" wide and the valance will hang 10".


 Then Fold, Pin and Stitch according to this diagram:
Hem the sides first!  Then sew the top and bottom.

I bought some cheap curtain rods from Lowes, (all three cost me about $15 total) but they work!  That's about it.  Pretty easy.  Total I spend less than $30 on this project.  The fabric was on sale at Jo-Ann's, I got 5 yards for $13.   I like.

Operation COLOR!

Today I am very excited.  Today is the day I add some color to my walls!  The paint in my bathroom is obviously poor quality cause it's been bubbling and peeling off.  Seems it needs to be re-painted anyway my husband has gracefully agreed to let me color the walls.  The color I've chosen:


We bought two samples last night and painted a section of wall and the other color was Way to Dark... so this one won out.  I've just ordered my paint from Lowes and I'm going to pick it up in a couple hours.

Now I've got to go remove all our hardware and get the kids bundled up so I can go get my PAINT!

I'm Pretty Excited.

January 12, 2011

Skylight Stars: Finished

Today I finished binding my Skylight Stars quilt.  I washed it and took some pictures.  What do you think?

Front:


Back:


You can see the stitching better on the back than the front, I think at least, it's an expanding star.

If I were to do this quilt over I would change one thing... the border colors (does that count as two things?)
I would make the inner border the light blue thats on the corners of the "starry lane" blocks and the outter border would be the dark blue mirage I used on the edges of the "starry lane" blocks.  I kinda feel that the borders make it look just a little too busy.  Oh well.  What's done is done and it doesn't look too bad.  I don't think at least.

January 11, 2011

1 year old on 1/11/11

So I have to show off my daughter's birthday cake.  I did NOT make this... although I wish I could say I did.  A friend of mine made it.  Isn't it beautiful?  I'm completely amazed.  It's too pretty to eat!  I'm very excited for tonight.


January 10, 2011

I spent $88 on a drawer system... so I could destroy it.

My baby's birthday is tomorrow.  Her first birthday.  2 weeks ago she was spoiled rotten for Christmas.  I didn't know what to get her she has every toy under the sun.  So my husband and I decided to get her something to store all those toys in.  After searching our town (and beyond) over for a cute toy box, we gave up and went to Ikea.  We found a cute drawer system that we liked, it was even green I was so excited!

When we got down to the pick-your-boxes section of the store we discovered they were OUT of the green drawers... I was really bummed out.  The other colors just didn't match the color scheme I've picked for her room!  So begrunged I picked some white drawers.  They are super glossy and I knew my paint wouldn't stick so when I came home I made my hsuband pull out his handy RIGID Belt Sander and I put him to work. 


After he finished sanding the drawers just enough that the paint would stick we pulled out the can of paint we used to paint her dresser a few months ago.  And we painted the fronts of the drawers.


Today while the kids were taking their first nap of the day I put the last two coats of paint on the fronts and during their second nap of the day I assembled the drawers.


I filled it right up with all her toys... she thinks it's great.


January 6, 2011

Crock Pot Chicken Burritos

I wish I could take credit for this great recipe, but honestly I cannot.  My friend, Effie, gave it to me.  It is So Good!  The best thing about this dinenr is it's only as spicy as you want it to be.  If you like it spicy, just add spicy salsa, or for mild flavor, add mild.  You can also buy the mild or spicy taco seasoning as well.

I often make this when my husband is at work for days at a time, then I have a healthy meal to have for lunch when I don't feel like cooking.
Anyway....

As Promised:

Crock Pot Chicken Burritos

3 or 4 Chicken Breasts (frozen)
1 Can Corn, drained
1 Can Black Beans, drained
1 pkg. Taco Seasoning
1 average size jar Salsa
Tortillas
Tomato, Lettuce, Sour Cream, Cheese, Onion, Spinach or whatever else you like on your burritos.

Combine top 5 ingredients in crock-pot and cook on low 6 hours, or on high 4 hours.
Remove Chicken and shred, return to pot. 
Serve on Tortillas with desired toppings.

January 3, 2011

Poll Results

The Dinner Poll closed a couple days ago... if you hadn't looked already.

The dinner choices were Parmesean Salmon and Crockpot Chicken Burritos,
and the Crockpot Chicken Burritos won out... by a lot. 
7 votes to 1.

So Whom-ever was the 1 person to vote for Parmesean Salmon, if you still want it leave me a comment with your e-mail and I'll send it to you.  ☺

Crock Pot Chicken Burritos will be coming soon.

New choices going up tonight.  Go ahead and take a look and leave a vote.

Skylight Stars

I finished piecing [one of ] my current project[s] last night.  I'm pretty happy with it.

This is my first ever completely boy-themed quilt.  Having little girls myself it's kinda hard to think "boy."
But I think it turned out nicely. 


Every quilt has blemishes, especially mine.  I spent 2 hours last night trying to fix a major blemish..
Can you see it?  No?  Okay good.  Thanks for your help ☺

Off to the fabric store today to buy a soft flannel backing and some quititng thread.