October 30, 2010

A new diaper bag and Diaper changing kit

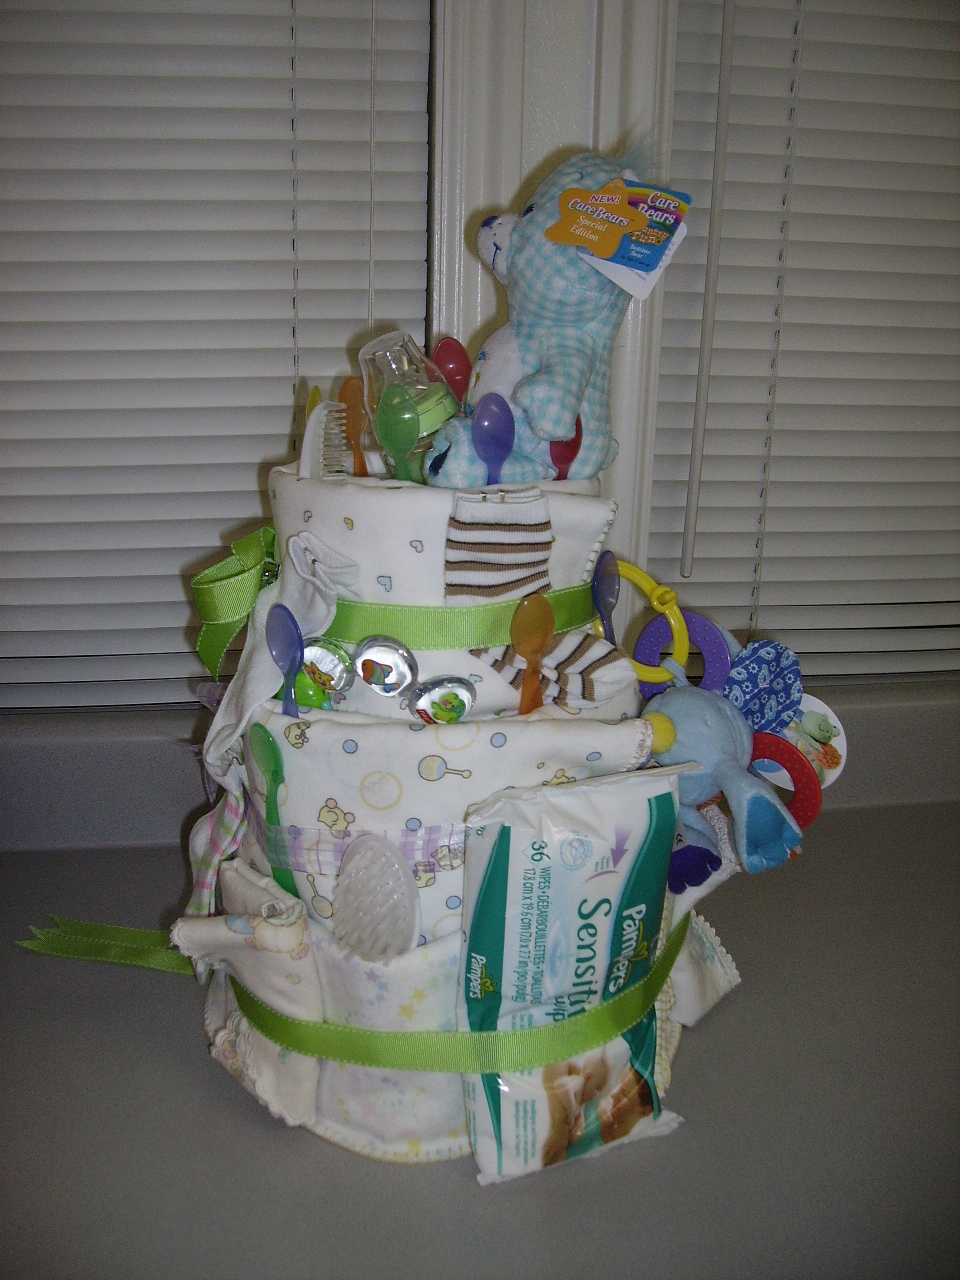
I wanted a new diaper bag a quite a while, but I could find the one I wanted. So I decided to make one. I made this like you make the rag quilts. (If you have any questions about rag quilts go ahead and ask) I added pockets while I sewed my pieces together and then sewed a strip around the top and added a handle. I also sewed a cute flower on it to add something fun to it. Hurray for a new diaper bag. (You could also make a purse, just use smaller squares and not as many) Make sure you don't cut through your seams as you are fraying the edges or your bag will fall apart......I learned that the hard way :) haha!

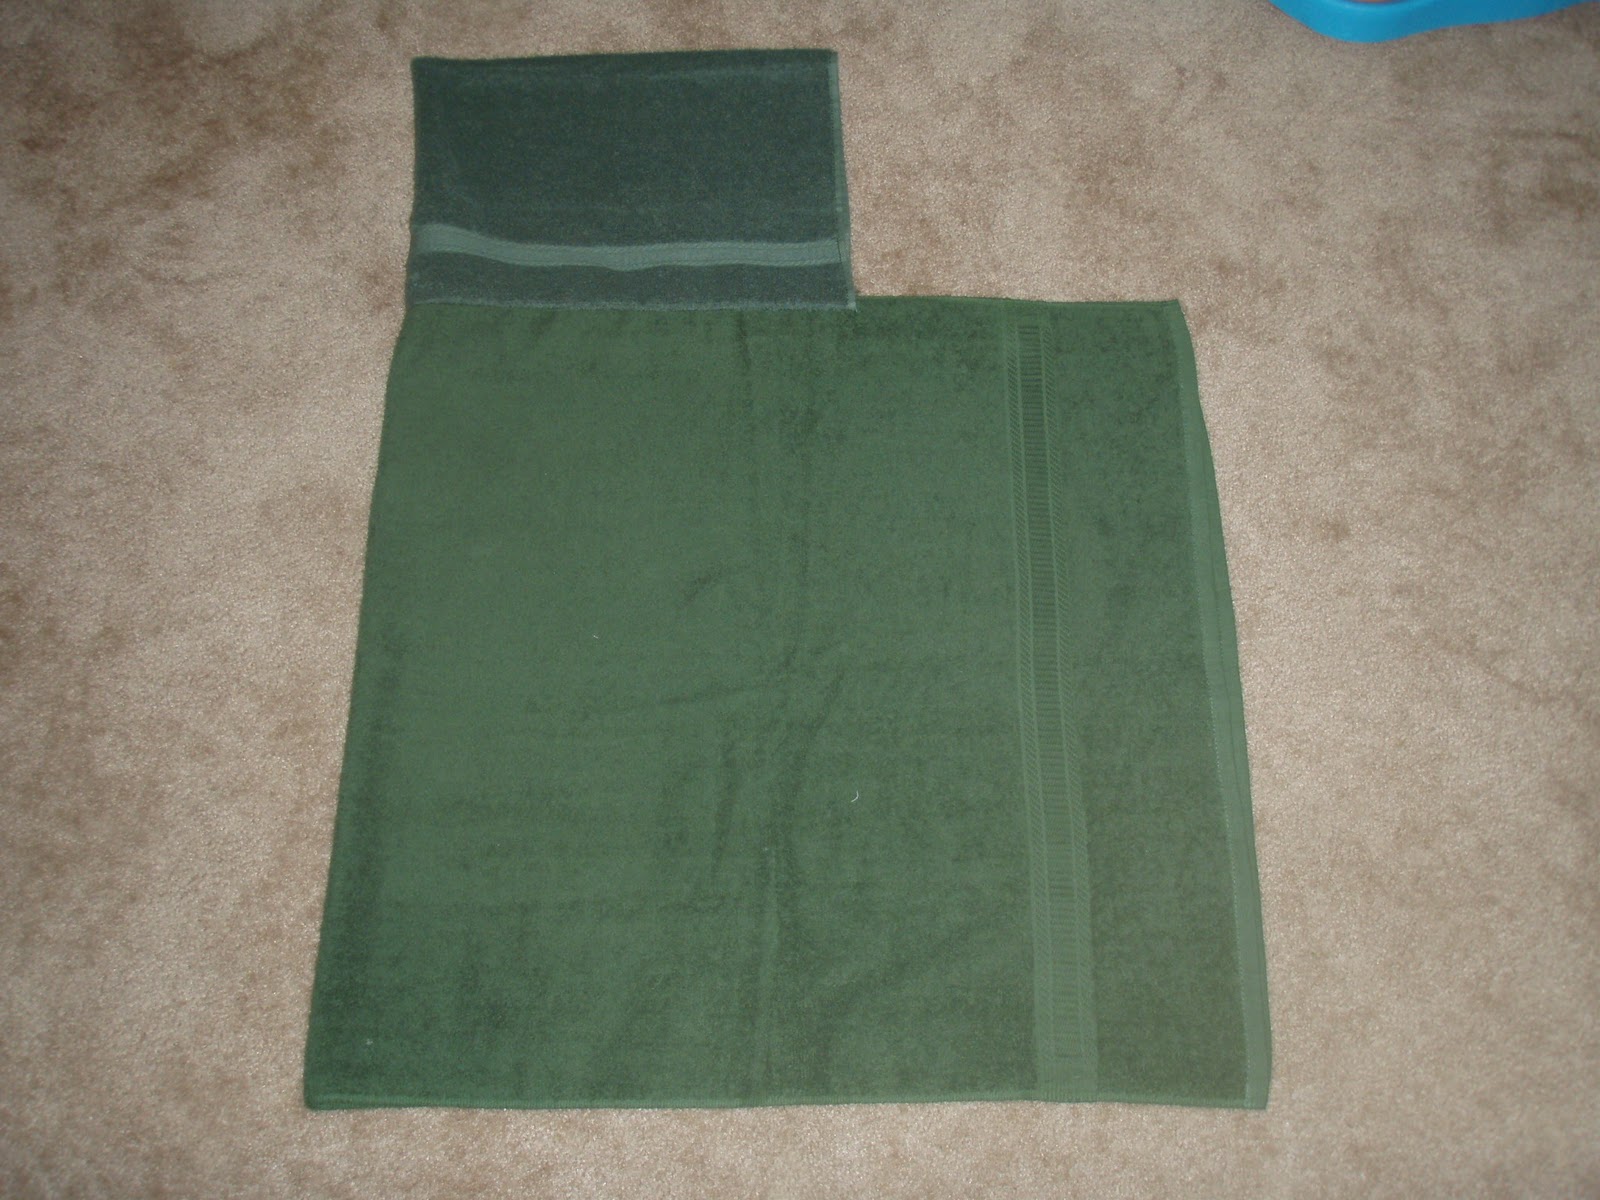
My dear friend made me a diaper/wipes holder for one of my baby showers. I thought it was a brillant idea and I loved it! One day I was sitting in a meeting and this thought came to me....I could totally combine her already brillant idea with a changing pad.....so I quickly drew it out and then sat through the rest of my meeting. Then I got everything I needed and quickly through my project together. Here it is all folded up pretty
And here it is all opened up and ready to use.
Want to make your own? Well you will need:
a placement
about 1/8 yd of fabric
a strip of elastic
a waterproof crib pad (this will make 4)
Some velcro

I folded up the bottom of the place mat and sewed a seam a little larger than a diaper to make the diaper pocket. Then I added a piece of elastic across the top portion to hold the diapers in (this was my mother in laws brillant addition) Then I hemmed the top of the place mat and made a pocket out of the fabric the same length as the hemmed placement. I then sewed the pocket on the side to make a spot for diaper wipes. ( I made my wipes cover by hot glueing fabric around the top and bottom of my travel wipes container and then added a little ribbon) Then I cut my waterproof pad into 4 pieces and then added 2 pieces of velcro to the back so I could take it out and wash it if needed. Then it folds up all nicely and now I only have to grab one thing when I am on the go and need to change a diaper. (I got a hand sanitizer that looks like a pen from my dr. so I added that in there too, very handy!) I also added a strap with velrco to hold the whole thing together.


Flower Ball

I have seen these all over stores and thought they looked cool. So I decided to make my own. I bought a styrofoam ball (if you are using colored flowers I suggest getting a green styrofoam ball) Then I bought a ton of silk flowers. This ball will take alot more flowers than you think, so get a ton! Even if you have to return some! Then I cut each flower off with about an inch of the stem left. Then I put some hot glue on the stem and pushed it into the styrofoam ball. I did this until the whole thing was covered. Then I attached a ribbon and hung it from my ceiling.

New pillows

We were given our couches when we got married. They have been great, but I was needing a change. So I decided to make new covers for the pillows.
I cut strips for the sides and square for the middle. I sewed them all together and then I made two overlapping pieces for the back so I could pull it on and off easily. Then I hand sewed a flower and sewed a button in the middle. Then I slipped them on over the top of my old pillows. Now I have cute new pillows! Hurray!

Bow holder

I bought a frame at all a dollar a while back and new used it. So after it collected dust for a year I decided to use it. I took out the glass and back and then hot glued ribbon from top to bottom. I did several strips down from top to bottom. Then I glued a ribbon at the top and tied a bow and hung it up. Now I have a great place for all those "pretty's" for my daughters hair.

Calendar

I LOVE this calendar! It is super easy to make and easy to use. I bought a poster board, measured the size of the boxes I wanted and then traced the lines with permant marker. Then I wrote the days of the week at the top. I left a blank spot at the top so I could write the months down with my other markers. I used stamps and made a little swirly thing in the top corners of mine. Then when it looks all pretty, you take it to your local print shop and get it laminated. Then I bought some wet erase markers (dry erase are a pain in the rear to erase) and then I write down my life on my calendar. Mine fits 2 months on it and when I get through a month, I erase the top month and copy the bottom month up to the top and then erase the bottom and start my new month. This is the system I use and it works for me. Find whatever system works for you! Oh and I hang my calendar up with sticky tack and it works great!

Baby Clothes and Acessories

My mom was getting rid of an old sweater and matching scarf so I cut the neck part off and sewed a C shaped to make a hat. Then I sewed the sides of the scarf up, measured the length I wanted and cut them off and hemmed them. Now my little lady has a cute hat and matching baby legs!
I felt like being crafty this summer so I attempted to make a bubble skirt without a pattern.....this is how it turned out. I made the skirt by cutting a piece of fabric twice the width I wanted and a little longer than the length I wanted. Then I made the waist band by wrapping my bobbin with the thinnest elastic I could find. Then I sewed a few different lines down the top of the skirt about a presser-foot width apart. Make sure the first line you do with the elastic bobbin also hems the top of the skirt too. (Sorry if that doesn't make sense....its late and I don't really know how to explain it) :) Then I sewed a stretchy fabric to the bottom of the skirt using the elastic in the bobbin as well. Then I folded up the stretchy fabric and attached it to the waist band by sewing a straight stitch along the waist. Then I sewed down the side. This probably was not the best way to make this skirt, but it is how I did it. A pattern probably would have helped make it look better.....hahah! I also made a matching flower for the shirt and a matching headband.
No sew tutu! I handed sewed (Ok I guess there is a little bit of sewing) the elastic the width I wanted and then cut strips of tulle and then tied it onto the elastic. I used blue and pink and alternated the colors throughout the tutu. Very easy! It took me about an hour to make the whole thing.

October 23, 2010

Kids Hooded Towels

After I had my first baby it didn't take me very long to discover that the hooded towels you can buy at the store just aren't quite up to par.  My first baby grew out of the towels by the time she was 6 months old, they are so skimpy and thin and my baby always looked cold wrapped up in that tiny towel. So I started making towels for my kids.  I use the same pattern for my baby and my toddler, and they're so easy to make!

Kids Hooded Towels

To made a hooded towel for your Baby, Toddler, or "BIG" Kid, you will need:

1 Large Bath Towel
1 Matching Hand Towel
Sewing Machine
Matching Thread

Take your hand towel and fold it in half, so it's short and fat, not long and narrow.  You also want to make sure that the wrong side of the towel is facing out.  Sew down one side of the towel adjacent to the fold.


Next take your bath towel and lay it out flat, right side up.  Take your hand towel and lay it on the long edge of the bath towel, line the sewn center up with the center of the bath towel and pin.  Make sure that your hand towel is right side out with the wrong side facing up.  (does that make sense?)

Basically you want to make sure that all your seems are going to be on the inside of the towel.

Pin your hand towel to the bath towel, making sure centers line up, and sew. 


TA-DA!  You now have a big, warm, and comfortable, hooded towel for your child.

You can embellish if you wish, possibly sew a ribbon down the side of the towel and the hood, or if you have the means you can embroider the child's name on it. 

This one is for my "soon-to-be" nephew, once he has a name I plan on embroidering it on the side of the hood and on one side of the towel.

Canning Salsa

Canning Salsa

I've always wanted to can my own salsa!  My Mother-in-law gave my the recipe she uses and I adjusted it a little bit to make it my own.  It was actually really easy.  Salsa should be canned in a Waterbath Canner, and you will need clean sanitized jars, rings and new seals.
To get started you will need:
4 Quarts Tomatoes
1 C. Dried Onion or 2 C. Freshly Chopped Onion
2 C. Chopped Peppers (any color)
1 Chopped Hot Banana Pepper, or Jalapeno
1/2 C. Sugar
1 can Green Chili's
2 Tbs. Tabasco Sauce
2 Tbs. Salt
1/2 C. Apple Cider Vinegar
Black Pepper
Garlic
Oregano


Sanitizing your jars: I put mine in the oven, on a cookie sheet, at 200° for 15 minutes. I turn the heat off after 15 minutes and leave the jars there until I'm ready to use them.  Place your seals in a saucepan of boiling water and keep them at a simmer until you're ready to use them.

Start the prep of your salsa by gathering your ingredients.  Your tomatoes will need to be peeled, seeded, juiced (to a point) and chopped.  I learned this new trick to peel tomatoes this year and I'll show it to you!  I think everyone should know!


Get a pot of water and bring it to a rapid boil.  Add tomatoes, just a few at a time, to the boiling water.  Boil the tomatoes for 1 minute.


Remove the tomatoes and put them straight into a waiting bowl of ice water.  The skins will fall right off!  It's wonderful!


After the tomatoes are skinned cut them in half and squeeze the tomatoes with your hands until most of the juice and as many of the seeds as possible are gone.
Place tomatoes in a strainer until you've finished skinning and squeezing all the tomatoes.


Chop tomatoes into chunks (however chunky or smooth you want it.) and place your tomatoes in a large pot.
Cook tomatoes on Med-Low heat, stirring occasionally, while you chop and prep the rest of your ingredients ☺


Add the rest of your ingredients and raise heat to Med-High.  Stirring occasionally heat the salsa until the mixture has reduced by half.


When Mixture has reduced by half your salsa is ready to be canned.  Carefully ladle the salsa into your sanitized jars, leaving 1" head space, top with lids and rings and place in water bath canner.  Process in canner for 15 minutes.  Let sit for 24 hours before checking for a seal.  If jars have sealed they are good to go, if not the must be refrigerated and used within a couple weeks.

October 22, 2010

Jar Covers

A couple weeks ago I made A LOT of pear jam.  I mean an awful lot of pear jam!  I put some in these little quilted jelly jars and I plan on giving them away at Christmas to my neighbors.
I wanted to make them a little more personal, it seems a jar, even one with jam in it, is just kind of boring.  So I made pretty little covers for the lids.  It was really very easy.  Here's how I did it.


 First I stared by measuring the lid of my jar..
I cut a piece of batting to fit the center of the lid.
 I hot glued the batting to the top of the jar.
This batting give the top of the jar a little more body.
Next I cut my fabric.  I cut it a couple inches larger than the top of the jar so it would hang down a little bit.  Set the material on top of the batting and use a small elastic to secure it to the jar.  You'll want to use one that no one will be able to see once you tie the ribbon.
Next I cut a piece of ribbon and wrap it around the top of the jar and tie a bow.  You can remove the elastic if you want to, but if you leave it on it'll help hold the material on. 

October 20, 2010

Pretty Letters

I don't know about you, but I love all those cute letters people have made. I decided that I needed some, so I found some wood letters I liked. (Wood Connection in SLC has great letters!) Then I sanded the letters a little and then stained them with a dark colored stain. Then I found some scrapbook paper in the colors I wanted and traced each letter onto the paper and cut it out. Then I modge podged the letters on and added any extras I wanted on to it ...and Volia!
I added glitter and a flower to this one.
I mounted this one on a board.

Temple Picture

I have dreamed for many years about owning a BIG beautiful picture of a LDS Temple. After I have grown up a little and realized things cost money and BIG beautiful pictures cost lots of money, I decided to make my own. You can really do this with anything you want a picture of though! First I went to the LDS Temple I wanted a picture of and took lots of pictures at different angles and locations around the temple. Then I went home and found the one I fell in love with. Then I edited it in my photo editing program and added a bunch of words, phrases, song lyrics, quotes, and anything else I felt like putting on it. Then I saved my file and brought it down to our local Costco (love that store) and had them print a giant copy of my picture. I guess I should back up a little and tell you about the frame first. I went to DI and looked through all the big picture frames they had. (I never thought of looking at DI for picture frames, but they have great ones sometimes!) Anyways I found this BIG frame that even had a really ugly mat in it. So I purchased it and brought it home. I sanded it down a little and then pulled out some handy spray paint and it looked good as new. Then I found some fabric that matched the picture and modge podged it on to the ugly mat. Now I had a pretty BIG frame and a pretty mat! Then I put my BIG picture in and hung it on the wall. I am pretty sure I love my BIG beautiful Temple picture! What do you think?

Piano Cover

We recently got a digital piano and have had a great time with it. Over the past few weeks we have noticed it gets really dusty. In addition to the dust, my daughter thinks it is a fun toy for her to touch with her sticky little fingers. So I decided it was time for a cover.
First I measured...several different times...:) because I am parinoid about cutting fabric, then I cut out all the pieces and then just started sewing them all together.

I decided to line the cover with a flannel because it attracts dust, so hopefully my dusting the piano days will be cut in half.


I am not quite finished with it yet, but I will post pictures of the finished project when it is complete.

Hurray for dust free pianos!

Diaper Cakes

 Diaper Cakes are, in my opinion, one of the best gifts for a baby shower!  New mothers just love getting them and they just look so darn cute!  I have a lot of fun making them, they are completely customizable and so easy to make.  They can get a bit expensive, let's face it, baby stuff is Expensive these days!  Anyway here is how to make a diaper cake.

You'll Need:
1 large package Size 2 diapers (52 diapers)
3 Recieving blankets (the ones on these cakes are homemade and slightly larger than your store bought blankets)
Ribbon, at least 1" wide and plenty of it.
1 Bottle
1 Stuffed Toy
52 small elastic (little elastic hair bands work great)
string or very large elastics
Whatever baby toys and accessories you want to add.

I usually use: baby spoons, binkys, diaper cream, tylonel, hair brush/comb, baby powder, oil and soap etc...

Take the diapers and roll each one tightly wrap a small elastic around each diaper to hold it tightly.  Arrange diapers on end, in 3 circles, large, medium and small.  Stick the bottle in the center of the smallest circle of diapers.  Tie with string, or using rubber bands to hold the diapers a circle while you decorate ☺ This is the fun part!  Fold each blanket to the same width as the diapers are tall, wrap each blanket around the diapers and tie, somewhat loosly, with ribbon.  Arrange your baby accessories by sticking them inside the blankets and ribbons.  Stack layers to look like a cake.  Place your stuffed toy on top and watch the look on the New Mothers face when she sees her diaper cake!

As a carrying tip, you might want to get a piece of cardboard or pan to carry the cake on so the diapers don't fall out the bottom of the cake.  I used a pizza pan, just the right size.


Broccoli & Cheese Soup

This is a very good side dish, but it wasn't hearty enough to fill my family as a main course.

Broccoli & Cheese Soup

3 C. Broccoli (trimmed into bitesize pieces)
1 small carrot, sliced or shredded
1/4 tsp. Salt
1/8 tsp. Pepper
1 can Chicken Broth
2 Tbs Flour
1/4 C. Cold Water
1 C. Half and Half
1 C. Shredded Cheddar Cheese

Heat broccoli, carrot, salt, pepper & chicken broth in sauce pan over high heat.  Once boiling, reduce heat to simmer.  Cover and cook 6-8 mintues or until broccoli is tender.  Mix flour and water together in a small bowl, add slowly to soup, stirring constantly while pouring.  Heat over high heat, boil 1 mintue, stirring constantly.  Stir in half and half, and cheese, cook until hot and steamy, do not boil.

Parmesan-Dijon Chicken

Parmesan-Dijon Chicken

6 Chicken Breasts ( i tenderized mine, but you don't have to)
1/4 C. Margarine
3/4 C. Dry Bread Crumbs
1/4 C. Parmesan cheese
2 Tbs Dijon Mustard

Melt Margarine, add mustard to melted margarine.  In seperate bowl mix cheese and bread crumbs.  Dip chicken in mustard mixutre, followed by the bread crumb mixture.  Place chicken in single layer in shallow baking dish.  Bake 20-30 minutes at 375°.

Stir-Fried Broccoli and Pork

Stir Fried Broccoli and Pork

1 lb Pork Loin
1 clove garlic
2 small onions
1 can waterchesnuts
1 Tbs Soy Sauce
2 tsp. Cornstarch
1/2 tsp. cayenne
2 Tbs Vegetable oil
3 C. broccoli flowerets
1/4 C. Chicken Broth
1/2 C. Peanuts

Slice pork into 1/8" thick strips.  Mix garlic, soysauce, cornstarch and cayenne in glass, stir in pork. Cover and refrigerate 20 minutes.  Heat skillet over high heat 1-2 mintues, add oil, then pork.  Stirfry 5-6 mintues or until pork is no longer pink.  Add onions, broccoli, and waterchesnuts to pork.  Stirfry 2 mintues.  Stir in broth, heat to boiling over high heat.  Stir in peanuts.  Serve with rice.

BBQ Beef Sandwiches

BBQ Beef Sandwiches

Prep time 10 minutes
Cook time 1 hour 15 minutes

1 to 1 1/2 lbs round steak, sliced 1/8"-1/4" thick
1 Cup BBQ sauce, any flavor
1/4 Cup Water
1 Onion, sliced into rings
Sandwich Rolls

Mix BBQ sauce and water in large skillet, add beef strips and onion rings.
Heat over med-high heat until boiling, lower heat to med low, cover with lid or tin foil and simmer for 1 1/4 hours, stirring occassionally; if needs be add more bbq sauce to prevent burning as it simmers.
Put meat and onions on rolls and serve warm.

*Original Recipe Taken from beefitswhatsfordinner.com*

Stir-Fried Beef Gyros

Stir-fried Beef Gyros
Prep time: 10 minutes
Cook time: 10 minutes

Serves 4

1 lb beef round tip steaks, cut 1/4" thick
2 Cloves Garlic, minced (2 tsp dried minced garlic)
1 tsp dried Oregano
3 tsp Olive Oil
1/4 tsp Salt
1/8 tsp Pepper
4 Pita Pockets, cut in half & warmed
Tomato Slices
Ranch Dip
Cucumber Slices

Cut steaks into 1 inch (stir-fry) strips, toss with garlic and oregano.
In large skillet heat 1 tsp oil over med-high heat, add 1/2 beef, stirfry 1 minute or until surface is browned. Remove and repeat with remaining beef.
Return all beef to skillet and heat thru, season with salt and pepper. Serve in pita pockets with tomatoes, cucumber and ranch dip.

Sizzler's Malibu Chicken

If you've ever been to a Sizzler and had the malibu chicken and loved it, we have something in common!  If you don't know what I'm talking about, that's okay.  Basically it's really good chicken. ☺

Sizzlers Malibu Chicken
Prep and Cook Time: About 30 min
Serves 4

1/4 C. Flour
1/4 tsp Salt
1/8 tsp Pepper
1 Egg
1 Tbsp Water
4 Chicken Breasts, skinned, bonned, pounded thin
3/4 C. Fine Dry Breadcrumbs
2 Tbsp Olive Oil
2 Tbsp Butter
4 Slices Cooked Deli Ham
4 Sliced Swiss Cheese
1 tsp. Mustard
1/4 C. Mayonnaise

Combine flour, salt and pepper. Stir Egg and water together w/ fork. Coat each chicken piece w/ flour, dip into egg mixture and then coat with bread crumbs. Press crumbs in firmly.
Heat oil and butter in large skillet over medium heat. Brown chicken 4-5 mintues on each side. Place in oven proof dish. Top with ham and cheese.
Bake at 350 until cheese melts
Combine mustard and mayo. Serve chicken with dipping sauce.

Asian Sesame Stir-fry

Asian Sesame Stir-fry

Marinade Time: 30 mintues
Prep/Cook Time: 20 Mintues

1 lb top round steak, cut 3/4" thick
1/2 C. Asian-Sesame Dressing
2 tsp Minced Garlic
2 1/2 C. Green Beans (2" length)
Hot Cooked Rice

Cut beef steak into 1/4" thick strips. Combine 1/4 C. dressing and garlic in medium bowl, add beef and toss to coat. Cover and marinate in fridge 30 minutes.
Heat large nonstick skillet over med-high heat until hot. Add green beans and remaining 1/4 C. dressing; stir-fry 5-7 mintues or until crisp-tender. Remove from skillet; season weith salt as desired, set aside.
Remove beef from marinade; discard excess marinade. Add 1/2 of beef to same skillet; stir-fry 1-2 mintues or until outside is no longer pink. Remove from skillet. Repeat with remaining beef.
Return green beens and beef to skillet; cook and stir 1-2 mintues or until heated through. Serve with rice.

Roasted Red Potatoes w/ Greens

Roasted Red Potatoes w/ Greens

1 1/2 lb small Red potatoes
1/4 C. Olive Oil
1 tsp. dried Rosemary
5 cloves crushed garlic or 2 1/2 tsp dried minced garlic
Green Beans
Sugar Snap Peas

Pare the peeling of the center of each potato all the way around, mix oil, rosemary & garlic in bowl, add potatoes and toss to coat. Place potatoes in a shallow baking dish and roast at 350 for 40 minutes or until potatoes are fork tender. In a pot of boiling water boil green beans and peas until for tender. When both dishes are done mix together with a little bit of butter, if desired.

Spiced Chicken

Spiced Chicken

Prep Time: 5 Mintues
Marinate Time: 24 Hours
Cook Time: 1 1/2 Hour

1 4lb Whole Chicken
2 Tbsp Salt
1 Tbsp Sugar
1/8 tsp each of Cinnamon, Nutmeg, Allspice, & Cloves
1 Reynolds Oven Bag Large Size
Mix spices, salt and sugar together and rub on thawed out chicken. Cover and store in fridge for 24 hours. Following instructions on Reynolds Oven Bags and bake at 350 for about 1 1/2 hours ( see reynolds oven bags chart for exact time) or until the internal temp is about 180.

Chicken Burritos

Chicken Burritos

Start to Finish < 30 Minutes

Just use as much of each ingredient as you need :) All toppings are optional, just pick what you like.

Tortillas- (different flavored tortillas add a nice twist to this dinner)
Cooked Rice
Cooked Beans (black or pinto)
Cooked Chicken cut into smallish pieces
Tomato diced
Cheese, shredded
Lettuce, shredded
Sour Cream
Onion, chopped
Teryaki Sauce or BBQ Sauce

Place desired toppings in tortilla and roll into a burrito. Enjoy!

These are quick and easy and our family enjoys them often!
If you want to you can even try different kinds of meat, shredded beef, ground beef, steak strips, or a marinated chicken.

Autumn Quilt

This quilt is a simple 9-Patch square set on an angle.  It has a pocket sewn on the back for the dowel of my quilt rack.  It's by no means perfect, but I like it well enough.  If you have questions feel free to comment and I'll answer anything I can!

Canning Pumpkin

Pumpkin is probably one of the easiest things I have canned to date.  You will need a Pressure Canner!  Keep in mind that the National Center for Home Food Preservation does not recommend pumpkin puree for canning.  It is too thick and the heat from processing will not penetrate the center of the jar.  Instead we can cubed pumpkin, then when you want to make your pumpkin pie you'll just need to put the contents in your food processor or blender and puree it.


You'll Need:
Pie Pumpkins (I had 4 pumpkins and got 3 quarts)
Boiling Water
A Microwavable Dish with Lid
A Spoon
Jars, Rings, and Seals
Jar Funnel
Pressure Canner
Jar Lifter, and Magnetic Lid Lifter

First start by sanitizing your jars, you can put them in the dishwasher if you'd like, on a hot or sanitize wash.  Personally I prefer to put mine in the oven.  I place my jars on a cookie sheet and place in a 200° oven for 15 minutes.  I turn off the oven and  leave them in the warm oven until I'm ready to use them.

You'll need to place your seals in boiling water and keep them at a simmer until you're ready to use those too.

Wash each pumpkin, cut in half and scoop out all the seeds ( you can save the seeds if you'd like to roast them or to plant them in the spring!) Remove the stem.  Place pumpkin in a microwavable dish with a couple inches of water and cook for 10 minutes on high heat.  (You might have to cut one half of the pumpkin in half again to get it to fit in the dish) 

Very Carefully remove the hot pumpkin from dish and hold it in one hand (use a hot pad or oven mitt)  scoop out the center of the pumpkin in large pieces, discard the skin.  (Save the cooking water, or have boiling water on hand)  Cut the pumpkin into 1" -1 1/2" cubes. 

Place pumpkin squares in jars leaving 1" head space at the top of the jar.  Pour boiling water or cooking liquid over the pumpkin in the jars leaving 1" head space!  Place seals and rings on jar.  Tighten rings finger tight. 

Process in a PRESSURE Canner, following manufacturers instructions, at 10 lbs of pressure for 90 mintues.

Remove with Jar Lifter, cool jars 1" apart from each other for 24 hours.  Check seals and store.  If jars are not sealed they will need to be refrigerated and used within a couple weeks.